Table of Contents
- A Beginner’s Shadowboxing Exercise Routine
- What Is Shadowboxing and Why It Works
- What You Need Before You Throw Your First Punch
- The Beginner’s Shadowboxing Routine: The 20-Minute Session
- How to Structure Your Weekly Shadowboxing Plan
- Common Beginner Mistakes and How to Fix Them
- How to Make Shadowboxing Feel Like Real Sparring
- Advanced Tweaks for When You’re Ready
- Conclusion
- FAQs
A Beginner’s Shadowboxing Exercise Routine
Shadowboxing is like having a secret conversation with your own body. You throw punches at nothing, move around an invisible opponent, and somehow end up drenched in sweat. It sounds strange until you try it. Then it feels like freedom. You do not need a gym, a partner, or even a heavy bag. You just need a little space, a timer, and the willingness to look a bit silly for twenty minutes. That is the magic of it. The sillier you allow yourself to be, the sharper you become.
This beginner’s shadowboxing exercise routine is built for people who have never thrown a real punch in their lives. Maybe you watched a boxing match and thought, I could never do that. Maybe you are bored with jogging and want something that works your brain as much as your muscles. Whatever brought you here, you are in the right place. We are going to build your routine step by step, from stance to cool-down, with simple drills that make sense. No jargon. No pressure. Just you, your shadow, and a plan that actually works.
What Is Shadowboxing and Why It Works
Shadowboxing is the art of practicing boxing techniques without a physical target. You imagine an opponent in front of you, then you move, punch, defend, and reset. It is not just a warm-up for fighters. It is a full workout that develops coordination, endurance, speed, and mental focus. Think of it as a rehearsal for movement. When you shadowbox, you are teaching your nervous system how to react before the pressure is real.
The beauty is that you can scale it to any fitness level. A beginner can throw slow, deliberate jabs. A pro can simulate twelve rounds of world-title intensity. The exercise meets you where you are. And because there is no impact, there is less stress on your joints than running or jumping. Your shoulders, hips, and core do the work. Your lungs get a challenge. Your mind gets a puzzle.
The Beauty of an Empty Ring
There is something almost meditative about shadowboxing. You are alone, but you are not lonely. You are problem-solving in motion. Your imaginary opponent steps left, so you pivot. They throw a jab, so you slip. You counter with a cross. It is like playing chess with your feet. The empty ring becomes a laboratory where you can experiment without fear. You can mess up. You can look awkward. No one is watching. That freedom is exactly why beginners improve so quickly.
Benefits You Can Feel in Week One
You do not need months to notice a difference. Within a few sessions, most beginners feel more coordinated and confident. Here is what shadowboxing brings to the table:
- Cardio without boredom: You forget you are exercising because you are focused on technique.
- Full-body strength: Your legs, core, shoulders, and back all pitch in.
- Better balance: Footwork drills train your stabilizer muscles.
- Mental sharpness: You practice decision-making under mild fatigue.
- Stress relief: Throwing punches at an invisible foe is surprisingly satisfying.
And here is the best part: you can do it almost anywhere. A bedroom, a garage, a hotel room, a patch of grass. If you have two arms and a little floor space, you have a gym.
What You Need Before You Throw Your First Punch
You might be tempted to buy every piece of boxing gear you see online. Resist that urge. A beginner does not need much. What you need is comfort, safety, and a clear space. Let us keep it simple.
Gear That Actually Matters
First, wear clothes that let you move. A t-shirt and shorts work fine. Avoid jeans, tight hoodies, or anything that restricts your shoulders. If you have boxing gloves, great. If not, bare hands are perfectly okay for shadowboxing. You are not hitting anything, so you do not need hand wraps either. Later, if you add a heavy bag, then you can invest in gloves and wraps.
Shoes are a personal choice. Some people shadowbox in bare feet because it helps them feel the floor. Others prefer sneakers for ankle support. Try both. Your feet will tell you what they like. A timer or a phone with a round timer app is helpful, but a simple clock works too. A mirror is optional but useful for checking your form.
Space, Safety, and Sanity Checks
Clear at least six feet by six feet of floor. Remove coffee tables, pet toys, and anything you might trip over. If you are in a small room, make sure you can extend your arms fully without punching a wall. Trust me, punching a wall is a great way to end a workout early. Check the ceiling if you plan to throw uppercuts. Check the floor for slick spots. If you have a mat, use it. If not, carpet or grass is fine.
Also, check your body. Are you injured? Do you have a shoulder that clicks or a knee that aches? Shadowboxing is low-impact, but it is not zero-impact. Start slow. If something hurts, stop. You are not training for a title fight on day one. You are building a habit.
The Beginner’s Shadowboxing Routine: The 20-Minute Session
This routine is designed to take twenty minutes from start to finish. It includes a warm-up, four focused rounds, and a cool-down. Do not skip the warm-up. Cold muscles are grumpy muscles. Do not skip the cool-down. Your future self will thank you. Set a timer for each section, or just keep an eye on the clock. The goal is steady progress, not perfection.
Warm-Up: Wake Up Your Body (3 Minutes)
Your warm-up is like opening the curtains before the sun comes in. It tells your body, Hey, we are about to move. Spend three minutes here. Do not rush it.
Neck and Shoulder Rolls
Stand tall. Roll your neck slowly in a circle five times to the right, then five times to the left. Do not force it. Then roll your shoulders forward ten times and backward ten times. Shrug them up to your ears, hold for a second, and let them drop. Feel the tension leaving your upper body.
Arm Circles and Wrist Prep
Extend your arms out to the sides. Make small circles forward for twenty seconds, then backward for twenty seconds. Gradually make the circles bigger. Then shake out your wrists. Rotate them in circles. Flex and extend your fingers. Your hands are about to do some work, so show them a little love.
Light Footwork and Bounce
Now, bounce gently on the balls of your feet. Do not jump high. Just a soft, rhythmic bounce. Move side to side, forward and back. Imagine you are standing on hot pavement. Keep your knees soft. Let your arms hang loose. This wakes up your calves and hips. After one minute, you are ready to box.
Round 1: Stance and Guard (4 Minutes)
Everything in boxing starts with your stance. If your stance is wrong, every punch feels awkward. If your stance is right, power flows from the ground up. Take your time here. This is not a race.
Find Your Fighting Stance
If you are right-handed, your left foot goes forward. If you are left-handed, your right foot goes forward. Your feet should be shoulder-width apart, with your back heel slightly lifted. Turn your body so your lead shoulder points toward your imaginary opponent. Your chin tucks down. Your hands come up. Your weight is balanced between both feet. Think of your stance as a coiled spring. You are ready to move, but you are not tense.
Build the High Guard
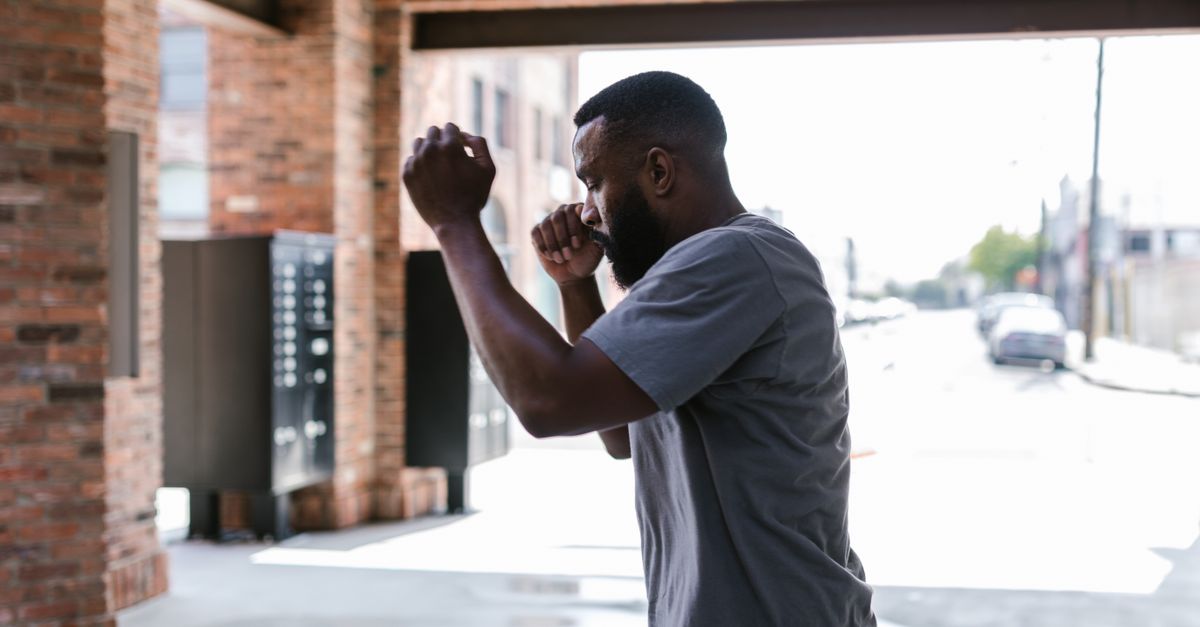
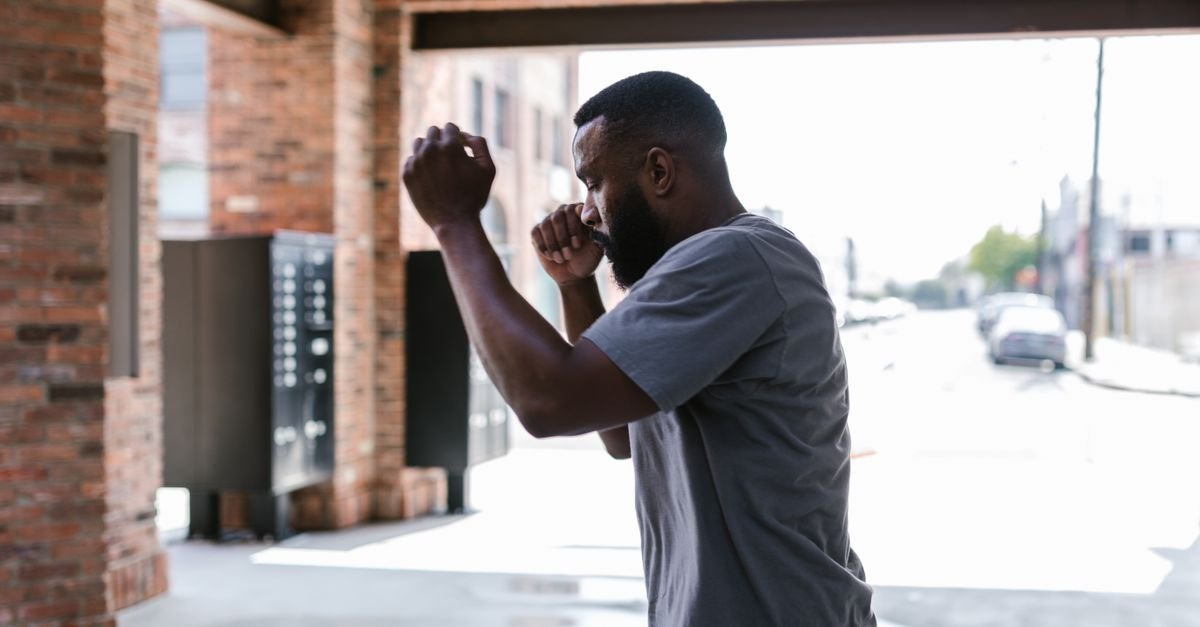
Bring your hands up to your cheeks. Your lead hand is slightly forward. Your rear hand is near your chin. Your elbows tuck in to protect your ribs. Do not hold your breath. Do not squeeze your fists too hard. Keep them loose until the moment of impact. Your guard is your shield. It should feel natural, not like you are carrying a heavy backpack.
Drill: Step and Reset
For the next four minutes, practice stepping forward and backward in your stance. Step forward with your lead foot, then bring your rear foot up. Step backward with your rear foot, then bring your lead foot back. Keep your hands up the whole time. Every ten steps, reset your stance. Check your balance. Are you leaning too far forward? Are your feet crossing? Slow it down. This drill builds the footwork foundation for everything else.
Round 2: The Jab and Cross (4 Minutes)
Now we add punches. The jab and cross are the bread and butter of boxing. They are simple, effective, and they set up everything else. Do not worry about power yet. Focus on form.
The Jab: Your Range Finder
The jab is a straight punch with your lead hand. It snaps out and comes right back. Think of it as a doorbell. You are not trying to knock the door down. You are just saying, Hello, I am here. Extend your arm without locking your elbow. Rotate your fist so your palm faces down at the end. Snap it back to your guard. Your rear hand stays glued to your chin.
The Cross: Your Power Line
The cross is a straight punch with your rear hand. It travels across your body. This is where you can put some weight behind it. Pivot your rear foot, rotate your hips, and let your rear hand shoot forward. Your lead hand returns to your face. The power comes from your legs and hips, not just your arm. Imagine you are pushing a heavy door open with your whole body.
Drill: 1-2 Combo on the Move
Throw a jab, then a cross. That is the 1-2. Do it slowly at first. Then add a step forward with the jab and a step forward with the cross. After ten combos, switch to stepping backward. Keep your guard up between punches. Breathe out sharply with each punch. Do not hold your breath. If you feel off-balance, slow down. Four minutes of clean 1-2s will teach you more than four minutes of sloppy power shots.
Round 3: Hooks and Uppercuts (4 Minutes)
Hooks and uppercuts are close-range punches. They feel awkward at first. That is normal. Your body is learning new patterns. Be patient with yourself.
The Lead Hook
The lead hook comes from your lead hand. Bend your elbow to about ninety degrees. Rotate your lead foot and hip as you swing your arm. Your fist travels in a horizontal arc. Imagine you are hugging a tree. Keep your elbow up. Do not wind up. The hook is short and sharp. Snap it back to your guard.
The Rear Uppercut
The rear uppercut comes from your rear hand. Drop your shoulder slightly, bend your knees, and drive upward. Your fist travels in a vertical arc. Think of it as scooping something off a low shelf. Rotate your rear foot and hip. Keep your other hand high. This punch can feel powerful, but do not sacrifice balance for it.
Drill: 3-2-3 and 2-3-2
In boxing numbers, 1 is jab, 2 is cross, 3 is lead hook, and 4 is rear uppercut. For this drill, practice two simple combinations: 3-2-3 and 2-3-2. That means lead hook, cross, lead hook. Then cross, lead hook, cross. Throw them slowly. Focus on rotating your hips and returning to your guard. Do not rush. Four minutes of these combinations will fire up your shoulders and core.
Round 4: Defense and Head Movement (3 Minutes)
Boxing is not just about throwing punches. It is about not getting hit. Defense is a skill. It requires relaxation and timing. This round is all about movement.
Slip, Roll, and Reset
Imagine a punch coming toward your face. Slip to the outside by bending your knees and moving your head slightly to the side. Do not bend at the waist. Keep your eyes on your imaginary opponent. Then roll under a hook by dipping your head and moving in a small U-shape. Reset to your guard. Do this slowly. Ten slips to the left, ten to the right. Ten rolls under. Feel your core working.
Drill: Ghost Punches
Now, imagine your opponent is throwing punches at you. Every few seconds, slip or roll. Then counter with a jab or cross. There is no actual punch coming, but your brain will start to react as if there is. This is called shadowboxing for a reason. You are fighting a ghost. Three minutes of this will improve your reflexes and your confidence.
Cool-Down: Breathe and Reflect (2 Minutes)
Stop throwing punches. Stand still. Take slow, deep breaths. Inhale through your nose for four counts. Hold for two. Exhale through your mouth for six counts. Repeat five times. Then gently stretch your shoulders, chest, and calves. Shake out your arms. Notice how your body feels. Are you more relaxed? More energized? Both? That is the shadowboxing effect. Take one minute to mentally review your session. What felt good? What felt clumsy? No judgment. Just awareness.
How to Structure Your Weekly Shadowboxing Plan
You can do this routine three to five times per week. Start with three. Give your body time to adapt. Each session can be the same for the first two weeks. Repetition builds muscle memory. Once you feel comfortable, you can add variety.
Sample 4-Week Progression
Week one: Do the 20-minute routine three times. Focus on stance, guard, and the jab-cross. Do not worry about speed. Week two: Add one more session. Start throwing your jab and cross with a little more snap. Week three: Add hooks and uppercuts to your combinations. Try three-minute rounds with one-minute rest. Week four: Put it all together. Shadowbox for four rounds of three minutes, then add two minutes of defense drills. You will be amazed at how far you have come.
Rest, Recovery, and Avoiding Overuse
Rest is not laziness. It is part of training. Your muscles grow and adapt when you recover, not when you punish them. If your shoulders feel sore, take an extra day off. If your knees ache, check your stance and footwork. Do not push through sharp pain. Shadowboxing should feel challenging but not harmful. Sleep well, drink water, and eat protein. Your body is building new skills. Give it the fuel it needs.
Common Beginner Mistakes and How to Fix Them
Everyone makes mistakes. The key is to catch them early. Here are the most common ones I see beginners make, and how to fix them without frustration.
Loading Up Every Punch
A beginner often tries to knock out the ghost on the first punch. They wind up, tense their whole body, and lose balance. Fix: slow down. Throw your punches at fifty percent power. Focus on technique and speed. Power comes later. Remember, a fast jab that lands is better than a slow haymaker that misses.
Holding Your Breath
When people concentrate, they hold their breath. This makes you tired fast and tense. Fix: breathe out sharply with each punch. Make a soft hiss sound. Inhale through your nose between combos. If you forget, set a timer to beep every thirty seconds as a breathing reminder. It sounds silly, but it works.
Staring at the Floor
It is natural to look down when you are thinking about your feet. But in boxing, your eyes should be on your opponent. Fix: pick a spot on the wall at eye level. Imagine that spot is your opponent’s chest. Keep your chin down, but your eyes up. This also protects your chin from imaginary counterpunches.
Forgetting Footwork
Beginners often plant their feet and just throw punches. Then they wonder why they feel off-balance. Fix: treat every punch as a footwork drill. Step with your jab. Pivot with your cross. Move after every combination. Your feet and hands should work together. If your feet are stuck, your punches are stuck too.
How to Make Shadowboxing Feel Like Real Sparring
Shadowboxing can feel fake if you let it. But with a little imagination, it becomes a real mental challenge. Here is how to bring your sessions to life.
Visualize an Opponent
Give your imaginary opponent a face, a style, and a rhythm. Maybe they are taller with a long jab. Maybe they are shorter and love to hook. Adjust your movement to match. If they step left, you pivot. If they throw a jab, you slip. This mental movie makes the workout more engaging and more effective.
Add Rounds and a Timer
Use a round timer. Three minutes of work, one minute of rest. During the rest, do not sit down. Breathe, shake out your arms, and visualize your next round. The timer creates urgency. It mimics the structure of a real fight. You will be surprised how much harder you push when the clock is ticking.
Use Mirrors and Video
A mirror shows you what your body is doing. You might think your guard is high, but the mirror says otherwise. Video is even better. Record a round on your phone. Watch it later. You will spot mistakes you never felt. Do not criticize yourself harshly. Just note one thing to improve next time.
Advanced Tweaks for When You’re Ready
Once the beginner routine feels easy, you can add layers. Try shadowboxing with light dumbbells, but only if your form is solid. Add defensive pivots. Practice switching stances. Throw in feints. Imagine multiple opponents. The possibilities are endless. But remember: advanced does not mean complicated. It means more intentional. Keep the basics sharp, and you will keep improving.
Conclusion
Shadowboxing is one of the most accessible and rewarding workouts you can start today. You do not need a gym, a partner, or a single piece of equipment. You just need a little space and a willingness to move. This beginner’s shadowboxing exercise routine gives you a clear path: warm up, practice stance and guard, throw jabs and crosses, add hooks and uppercuts, work on defense, and cool down. Do it three times a week. Be patient. Be curious. Before you know it, you will move with more confidence, breathe with more control, and feel stronger in your own skin. Your shadow is waiting. Go say hello.
FAQs
How often should a beginner shadowbox?
Start with three sessions per week. Each session can be twenty minutes. After two weeks, you can add a fourth day if you feel recovered. Listen to your body. More is not always better. Consistency beats intensity.
Can I shadowbox without gloves?
Yes. Gloves are not required for shadowboxing because you are not hitting anything. Bare hands are fine. You can wear gloves if they help you feel more like a boxer, but they are not necessary for a beginner.
Is shadowboxing good for weight loss?
It can be. Shadowboxing burns calories and builds muscle. Combined with a balanced diet, it can support weight loss. The intensity matters. Moving continuously for twenty minutes will burn more calories than standing still and throwing one punch every minute.
What if I feel awkward at first?
Everyone feels awkward at first. You are learning a new skill. Your brain and body are building new connections. Keep practicing. Within a week or two, the movements will start to feel natural. Do not compare yourself to experienced boxers. Compare yourself to yesterday.
How do I know if my form is correct?
Use a mirror or record yourself. Check that your hands return to your guard, your chin stays down, and your feet do not cross. If you feel off-balance, slow down. You can also follow along with a video tutorial. But remember, perfect form takes time. Aim for better, not perfect.