Table of Contents
- The Hip Hinge: A Key Move for Lifting Well
- What Exactly Is a Hip Hinge?
- Why the Hip Hinge Matters More Than You Think
- The Anatomy Behind the Hinge
- The Glutes: Your Powerhouse
- The Hamstrings: The Unsung Heroes
- The Core: Your Safety Net
- Everyday Moments That Demand a Hip Hinge
- The Difference Between Hinging and Squatting
- How to Perform a Perfect Hip Hinge
- Step 1: Set Your Stance
- Step 2: Brace Your Core
- Step 3: Push Your Hips Back
- Step 4: Keep Your Spine Neutral
- Step 5: Drive Through Your Heels
- The Dowel Rod Drill: Your New Best Friend
- Common Mistakes People Make
- Rounding the Lower Back
- Bending the Knees Too Much
- Looking Up Instead of Keeping a Neutral Neck
- Why Your Lower Back Hurts After Lifting
- Hip Hinge Exercises to Build Strength
- Romanian Deadlifts
- Kettlebell Swings
- Good Mornings
- Hip Thrusts and Bridges
- How Often Should You Practice the Hip Hinge?
- The Hip Hinge and Injury Prevention
- Hip Hinge for Athletes vs. Everyday People
- Mobility Matters: Preparing Your Hips to Hinge
- Conclusion
- FAQs
The Hip Hinge: A Key Move for Lifting Well
Have you ever bent down to pick up a grocery bag and felt a sharp twinge in your lower back? You’re not alone. Millions of people tweak their backs every year doing something as simple as grabbing a suitcase or lifting a toddler. The culprit? Poor lifting mechanics, and more specifically, a missing hip hinge.
Here’s the thing: your body was designed to lift heavy things safely. But somewhere along the way, between desk jobs, long commutes, and hours spent scrolling on the couch, we forgot how to move the way nature intended. The hip hinge is that forgotten movement pattern, and rediscovering it can change everything about how you lift, move, and feel.
What Exactly Is a Hip Hinge?
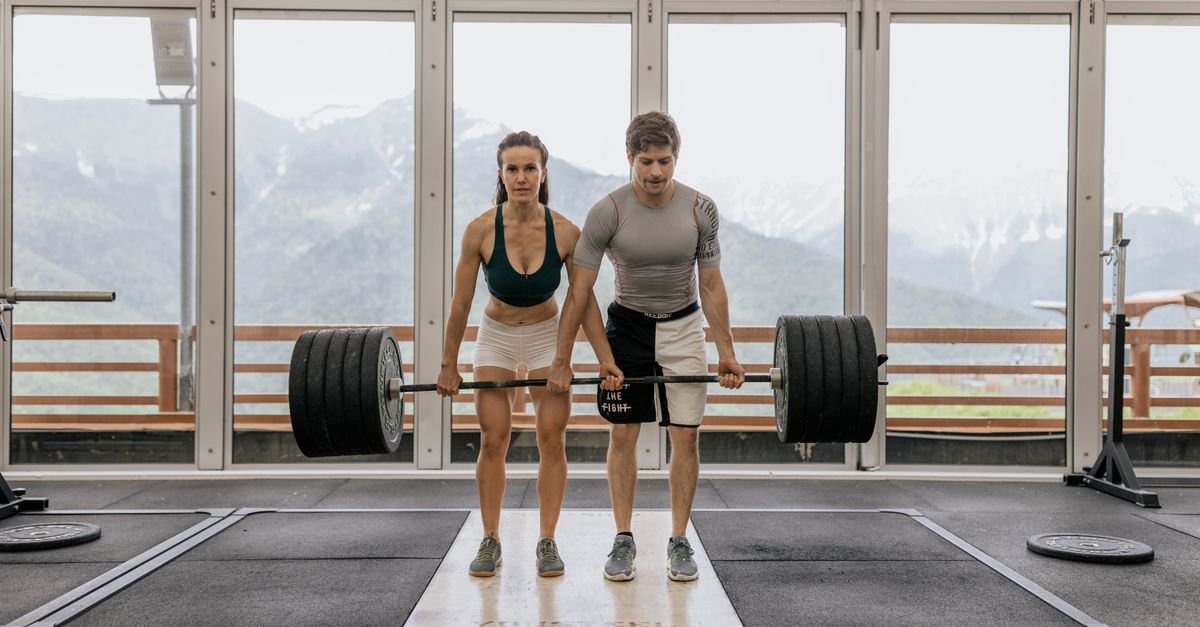
Think of a door hinge. It pivots at a fixed point, allowing the door to swing open and closed. Now imagine your hips working the same way. A hip hinge is a movement where you bend primarily at the hips while keeping your spine neutral and your knees slightly bent. It’s not a squat. It’s not a crunch. It’s a deliberate push of your hips backward while your torso leans forward.
Sounds simple, right? It is, in theory. But most people have lost the ability to do it correctly. Instead of hinging at the hips, they bend at the waist, rounding their lower back and putting enormous stress on their spinal discs. That’s the fast track to injury.
When you hinge properly, your glutes and hamstrings do the heavy lifting. Your back stays straight, your core braces, and your hips drive the movement. It’s elegant, efficient, and shockingly powerful once you get the hang of it.
Why the Hip Hinge Matters More Than You Think
Let’s get real for a second. You hinge dozens of times a day without even realizing it. Picking up your keys. Grabbing a laundry basket. Lifting your dog off the couch. Each of these moments is an opportunity to either protect your back or wreck it.
The hip hinge is the foundational movement pattern behind some of the most effective exercises on the planet. Deadlifts, kettlebell swings, Romanian deadlifts, good mornings, and even hip thrusts all rely on a solid hinge. Without it, you’re leaving gains on the table and inviting injury into your life.
But here’s the bigger picture: mastering the hip hinge isn’t just about lifting weights in the gym. It’s about lifting your life. It’s about picking up your kids without wincing. It’s about carrying groceries without fear. It’s about aging gracefully with a strong, resilient back.
The Anatomy Behind the Hinge
To really appreciate the hip hinge, you need to understand the players involved. Let’s break it down.
The Glutes: Your Powerhouse
Your glutes are the largest muscles in your body, and they’re designed to extend your hips. When you hinge, your glutes fire to bring your torso back to standing. Weak glutes mean a weak hinge, and a weak hinge means your back picks up the slack. That’s a recipe for disaster.
The Hamstrings: The Unsung Heroes
Your hamstrings run down the back of your thighs and cross both your hip and knee joints. During a hinge, they stretch under load as you lower down and then contract to help drive you back up. Tight or weak hamstrings can limit your range of motion and compromise your form.
The Core: Your Safety Net
Your core isn’t just your abs. It’s a whole system of muscles wrapping around your torso like a corset. During a hip hinge, your core braces to keep your spine neutral and stable. Without a strong brace, your back rounds, and your risk of injury skyrockets.
Everyday Moments That Demand a Hip Hinge
You might think the hip hinge is just a gym thing. Wrong. Here are some real-life scenarios where a proper hinge saves the day:
- Picking up a suitcase from the floor
- Lifting a box off a low shelf
- Getting a child out of a crib
- Pulling weeds in the garden
- Scooping up a bag of dog food
- Setting down a heavy pot of water
Every single one of these moments is a hip hinge in disguise. Nail the pattern, and you’ll handle all of them with ease.
The Difference Between Hinging and Squatting
This is where a lot of people get confused. Squatting and hinging look similar from a distance, but they’re fundamentally different movements.
In a squat, your knees bend significantly, your torso stays relatively upright, and your hips drop straight down. Think of sitting in a chair.
In a hinge, your knees stay slightly bent but don’t change much, your torso leans forward, and your hips travel backward. Think of closing a car door with your butt.
Both movements are essential. But conflating them leads to messy form and missed benefits. If you’re hinging when you should be squatting, or vice versa, you’re asking for trouble.
How to Perform a Perfect Hip Hinge
Ready to learn the move? Let’s walk through it step by step.
Step 1: Set Your Stance
Stand with your feet hip-width apart. Your toes should point forward or slightly out. Distribute your weight evenly across both feet.
Step 2: Brace Your Core
Take a deep breath into your belly, not your chest. Gently tighten your abs as if someone’s about to poke you in the stomach. This brace protects your spine throughout the movement.
Step 3: Push Your Hips Back
Here’s the magic moment. Instead of bending forward, imagine pushing your hips backward toward a wall behind you. Your torso will naturally lean forward as a result. Keep your chest proud and your shoulders back.
Step 4: Keep Your Spine Neutral
Your back should stay straight from your tailbone to the crown of your head. No rounding, no arching. If you feel your lower back curve, you’ve gone too far. Stop where you can maintain a neutral spine.
Step 5: Drive Through Your Heels
To stand back up, squeeze your glutes and push your hips forward. Imagine cracking a walnut between your butt cheeks. Return to standing tall, fully extending your hips.
The Dowel Rod Drill: Your New Best Friend
Want to know if you’re hinging correctly? Grab a broomstick or a dowel rod. Hold it against your back so it touches your head, your upper back, and your tailbone. Now perform a hinge. If the rod stays in contact with all three points, you’re golden. If it lifts away from your lower back, you’re rounding. If it digs into your back, you’re overextending.
This drill is a game-changer. Practice it daily until the pattern feels automatic.
Common Mistakes People Make
Even with the best intentions, people botch the hip hinge all the time. Here are the big ones to watch out for.
Rounding the Lower Back
This is the most dangerous mistake. When your lower back rounds, your spinal discs are compressed unevenly, and that’s when herniations happen. If you can’t hinge without rounding, reduce your range of motion until you can.
Bending the Knees Too Much
If your knees are bending like you’re doing a squat, you’ve lost the hinge. Keep your shins relatively vertical and focus on sending your hips back, not down.
Looking Up Instead of Keeping a Neutral Neck
Your neck should follow your spine. If you’re staring at the ceiling while hinging, you’re cranking your cervical spine. Keep your gaze neutral, looking at the floor a few feet ahead of you.
Why Your Lower Back Hurts After Lifting
If you’ve ever felt a dull ache or sharp pain in your lower back after lifting something, chances are you bent at the waist instead of hinging at the hips. When you round your back under load, your spinal erectors and discs take the brunt of the force. They’re not designed for that.
The hip hinge shifts the load to your glutes and hamstrings, which are built to handle heavy weight. Your back becomes a stable pillar rather than a bending branch. Make the switch, and your back pain may vanish.
Hip Hinge Exercises to Build Strength
Now that you know the pattern, let’s load it. Here are some of the best exercises to reinforce and strengthen your hip hinge.
Romanian Deadlifts
This is the gold standard. Hold a barbell or dumbbells in front of your thighs, hinge at the hips, and lower the weight down your legs until you feel a stretch in your hamstrings. Drive your hips forward to stand. Keep your back flat and your core braced.
Kettlebell Swings
Swings are explosive hinges. Hike the kettlebell back between your legs, then snap your hips forward to propel it to chest height. Your arms are just along for the ride. The power comes from your hips.
Good Mornings
With a barbell on your upper back, hinge forward until your torso is nearly parallel to the floor, then return to standing. This exercise demands serious core stability and hamstring flexibility. Start light.
Hip Thrusts and Bridges
These exercises emphasize hip extension, the second half of the hinge. Lie on your back with your feet flat, then drive your hips toward the ceiling. Squeeze hard at the top. They’re fantastic for glute development.
How Often Should You Practice the Hip Hinge?
Like any skill, the hip hinge improves with repetition. I recommend practicing the bodyweight version daily, even just a few reps. Once you’ve mastered the pattern, incorporate hinging exercises into your workouts two to three times per week.
Consistency beats intensity. Five minutes of focused practice a day will do more for your lifting mechanics than an hour of sloppy deadlifts once a week.
The Hip Hinge and Injury Prevention
Here’s the truth bomb: most back injuries from lifting are preventable. They happen because people use their spines as levers instead of their hips. The hip hinge is your insurance policy against those injuries.
When you hinge properly, your spine stays neutral, your core braces, and your powerful posterior chain does the work. Your risk of disc herniations, muscle strains, and chronic pain drops dramatically. It’s not about lifting less. It’s about lifting smarter.
Hip Hinge for Athletes vs. Everyday People
Athletes live and die by the hip hinge. Sprinters, jumpers, and Olympic lifters all rely on powerful hip extension to generate force. A weak hinge means a weak performance.
But you don’t need to be an athlete to benefit. The everyday person picking up a toddler or moving furniture needs the same mechanics. The only difference is the load. The pattern is universal.
Mobility Matters: Preparing Your Hips to Hinge
Stiff hips make hinging awkward. If your hamstrings are tight or your hip flexors are locked up, you’ll struggle to reach a proper hinge position. Spend time on mobility work:
- Hamstring stretches: Seated forward folds, standing toe touches
- Hip flexor stretches: Kneeling lunges, couch stretches
- Glute activation: Clamshells, banded walks
Better mobility means a smoother hinge and a safer lift.
Conclusion
The hip hinge is more than an exercise. It’s a life skill. It’s the difference between a strong, resilient back and one that betrays you at the worst possible moment. It’s the key that unlocks powerful lifts and pain-free movement.
Start where you are. Practice the dowel rod drill. Film yourself. Ask a trainer for feedback. Be patient. The hip hinge takes time to master, but once it clicks, you’ll wonder how you ever lived without it.
Your hips were made to move. Your back was made to stay stable. Give them what they want, and they’ll reward you with strength, confidence, and a body that handles whatever life throws at it. Now go pick something up. The right way.
FAQs
1. Can I hip hinge if I have lower back pain?
It depends on the cause and severity. Mild soreness might improve with proper hinging, but sharp or persistent pain needs medical attention first. Always consult a professional before starting new movements when you’re injured.
2. How is a hip hinge different from a deadlift?
A deadlift is a hip hinge with weight. The hinge is the movement pattern. The deadlift is one way to load it. You can hinge without deadlifting, but you can’t deadlift well without hinging.
3. Do I need equipment to practice the hip hinge?
Not at all. Bodyweight hinges and the dowel rod drill are incredibly effective. You can master the pattern without touching a single weight.
4. How long does it take to learn the hip hinge?
Most people see improvement in a few weeks with consistent practice. True mastery takes longer, but the payoff is worth every rep.
5. Can the hip hinge replace squats?
No. Squats and hinges are complementary patterns. You need both for a well-rounded, resilient body. Think of them as partners, not competitors.



