Table of Contents
- How to Build Up to Your First Push-Up
- Introduction: Why the Push-Up Feels Impossible (and Why It Isn’t)
- Why Push-Ups Are Worth Building Up To
- Are You Ready to Train for Your First Push-Up?
- The Foundation: Perfect Form Before Big Reps
- The Step-by-Step Push-Up Progression Plan
- A 4-Week Sample Schedule
- Common Mistakes That Slow You Down
- Accessory Moves That Speed Up Progress
- Recovery, Nutrition, and Mindset
- Conclusion: Your First Push-Up Is Closer Than You Think
- Frequently Asked Questions
How to Build Up to Your First Push-Up
Introduction: Why the Push-Up Feels Impossible (and Why It Isn’t)
You drop to the floor, hands flat, body ready. Then you try to press up, and it feels like the floor is glued to your chest. Sound familiar? You’re not alone. The push-up is one of those moves that looks simple until you actually try it. It asks your chest, shoulders, triceps, and core to work together while your body stays straight. That’s a lot of coordination for one exercise.
Here’s the good news: you don’t need to magically crank out a full push-up today. You can build up to it. Think of it like climbing a staircase. You don’t leap to the top floor. You take one step at a time. Each step makes the next one easier. In this guide, I’ll show you exactly how to go from zero push-ups to your first full rep with smart progressions, proper form, and a plan you can actually follow.
Why Push-Ups Are Worth Building Up To
Why bother with push-ups when you could bench press or use a machine? Because push-ups are brutally convenient. You need zero equipment. You can do them in a hotel room, a park, or your living room. They train your upper body and your core at the same time. And they teach you how to move your own bodyweight, which carries over to daily life.
Plus, push-ups build serious functional strength. Ever push a heavy grocery cart, shove a stuck window, or catch yourself when you trip? That’s pushing power. Push-ups also boost shoulder stability, improve posture, and give you a confidence boost when you finally nail that first rep. It’s not just about your chest. It’s about proving to yourself that you can get stronger.
Are You Ready to Train for Your First Push-Up?
Before you start, let’s check the basics. Can you stand, walk, and raise your arms without pain? Great. Do you have any sharp shoulder, wrist, or elbow pain? If yes, talk to a doctor or physical therapist first. Push-ups are safe for most people, but pain is a red flag.
Age isn’t a barrier. Fitness level isn’t a barrier. I’ve seen beginners in their 60s build up to their first push-up. The only real requirement is a willingness to start where you are. Can you lean against a wall and press? Then you can begin.
The Foundation: Perfect Form Before Big Reps
If you want your first push-up to feel strong, you need to know what good form feels like. Bad reps build bad habits. Good reps build strength and confidence. So before we dive into progressions, let’s break down the key pieces of push-up form.
Hand Placement and Wrist Comfort
Place your hands slightly wider than your shoulders. Your fingers should spread wide, like you’re gripping the floor. Avoid letting your elbows flare out to the sides like wings. Instead, keep them at about a 45-degree angle from your body. This protects your shoulders and gives you more pressing power.
Wrists can feel cranky at first. If that’s you, try doing push-ups on dumbbells, parallettes, or even books. This keeps your wrist neutral instead of bent back. You can also do wrist circles and gentle stretches before you train.
Quick Setup Check
- Hands slightly wider than shoulders.
- Fingers spread and pressing into the floor.
- Elbows angled back, not out.
- Wrists comfortable and supported.
Body Alignment: One Long Plank
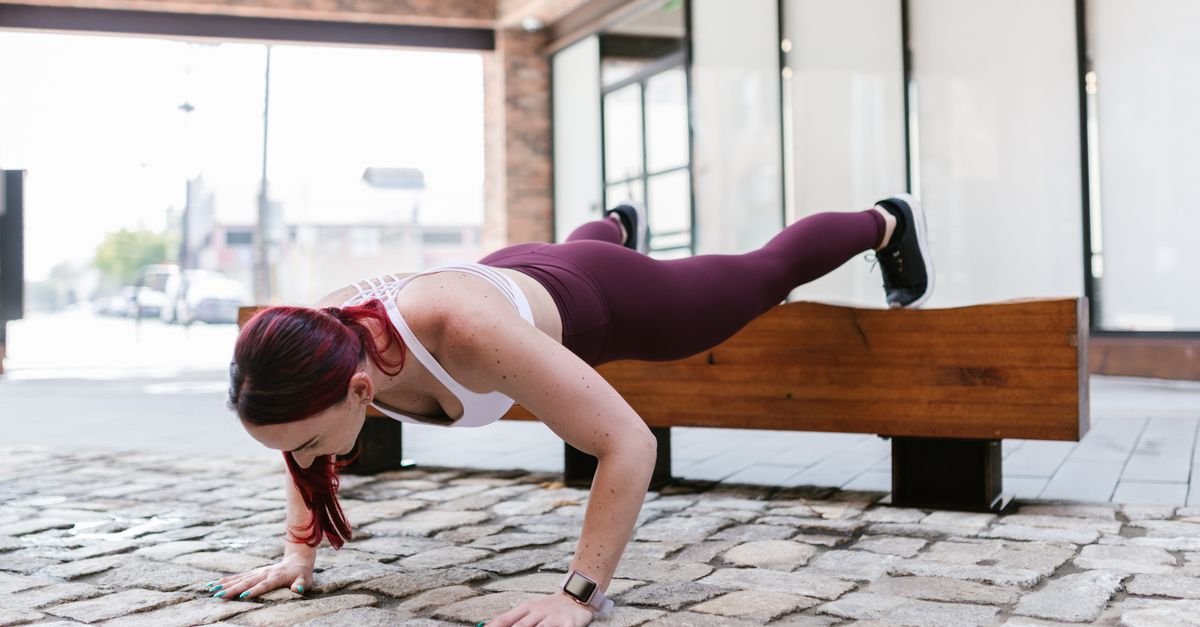
Your body should move like one long plank, not a wet noodle. Squeeze your glutes, brace your abs, and keep your neck neutral. Imagine a straight line from your head to your heels. If your hips sag, your lower back takes the hit. If your hips pike up, you’re not really doing a push-up. You’re doing a weird downward dog.
To find this position, stand tall and imagine someone pulling a string from the top of your head. Now keep that same length when you’re on the floor. Your core is the bridge between your upper and lower body. If the bridge collapses, the whole movement falls apart.
Breathing and Bracing
Breathing during push-ups often gets ignored. People hold their breath, turn red, and wonder why they feel dizzy. Instead, inhale as you lower down. Exhale as you push up. This rhythm keeps your blood pressure steady and helps you produce force.
The Brace Cue
Before you move, take a breath into your belly. Then tighten your abs like someone is about to poke you in the stomach. That’s your brace. Keep that tension as you lower and press. Your core isn’t just along for the ride. It’s the anchor that lets your arms do their job.
The Step-by-Step Push-Up Progression Plan
Now for the fun part. We’re going to build your push-up from the ground up using six levels. Don’t rush. Spend at least a week or two at each level if you need to. The goal is quality, not speed. If you can do 3 sets of 8 to 12 clean reps at one level, you’re ready for the next.
Level 1: Wall Push-Ups
Stand facing a wall, arms straight, hands at shoulder height. Step back until your arms are fully extended. Keep your body in a straight line. Now bend your elbows and bring your chest toward the wall. Press back to the start.
This might feel easy, and that’s fine. You’re teaching your nervous system the pattern. You’re also building base strength in your chest, shoulders, and triceps without loading your wrists too much. Aim for 3 sets of 10 to 15 reps. If that’s too easy, step further away from the wall. The farther you stand, the harder it gets.
Level 2: Incline Push-Ups
Find a sturdy bench, table, or countertop. Place your hands on the edge, slightly wider than your shoulders. Walk your feet back until your body is straight. Lower your chest to the edge, then press away.
Incline push-ups are the sweet spot for most beginners. They let you practice full-body tension while reducing how much weight you’re pressing. The lower the surface, the harder the exercise. Start with a high counter. As you get stronger, move to a lower bench. Aim for 3 sets of 8 to 12 reps.
Level 3: Knee Push-Ups
Knee push-ups get a bad rap, but they’re a legitimate training tool. Start in a plank position on your hands and knees. Your body should form a straight line from your head to your knees. Don’t let your hips sag. Lower your chest toward the floor, then press up.
The key is to keep your core tight and your hips moving with your body. Don’t bend at the hips like a hinge. If knee push-ups feel too hard, go back to incline push-ups. If they feel too easy, try elevating your feet slightly or moving to negative push-ups.
Level 4: Negative Push-Ups
Negatives are where the magic happens. Start in a full push-up position, either on your toes or knees. Lower yourself down as slowly as you can, taking 3 to 5 seconds to reach the floor. Then drop to your knees, reset, and do it again.
You’re building strength in the lowering phase, which is where you have the most control. Think of it like slowly letting down a heavy box instead of dropping it. Aim for 3 sets of 3 to 5 slow negatives. Once you can control the descent for 5 seconds, your first full push-up is close.
Level 5: Partial-Range Push-Ups
Partial-range push-ups are exactly what they sound like. You do a push-up, but you only go part of the way down. Maybe you lower halfway, then press back up. Or you start at the bottom and press up halfway. This builds strength in your weakest range.
Use a foam roller or a pillow under your chest to limit your range. As you get stronger, remove the prop and go deeper. Aim for 3 sets of 5 to 8 reps. Don’t rush this level. It’s the bridge between negatives and full reps.
Level 6: Your First Full Push-Up
The day has come. Get into a full plank position with your hands under your shoulders. Brace your core, squeeze your glutes, and lower your chest to the floor. Then push the floor away like you’re trying to shove the world down. That’s it. One rep.
Celebrate it. Then rest. Your first full push-up is a milestone, not a finish line. From here, you can work on doing two, then three, then ten. The same progressions that got you here will help you build reps.
A 4-Week Sample Schedule
Here’s a simple plan you can follow. Train three days a week, with at least one rest day between sessions. For example, Monday, Wednesday, and Friday.
- Week 1: Wall push-ups and incline push-ups. 3 sets of 8 to 12 reps each.
- Week 2: Incline push-ups and knee push-ups. 3 sets of 8 to 12 reps each.
- Week 3: Knee push-ups and negative push-ups. 3 sets of 5 to 8 reps each.
- Week 4: Negative push-ups, partial-range push-ups, and attempts at full push-ups. 3 sets of 3 to 5 reps each.
Listen to your body. If you’re sore, take an extra rest day. If a level feels too easy, move up. If it feels impossible, move back. The plan is a guide, not a prison.
Common Mistakes That Slow You Down
Even with a great plan, small mistakes can keep you stuck. Let’s fix them before they become habits.
Sagging Hips and Flaring Elbows
Sagging hips mean your core is giving up. Your lower back arches, and your press becomes a weird hip thrust. Fix it by squeezing your glutes and bracing your abs before every rep. Flaring elbows put your shoulders in a risky position. Keep them at 45 degrees. Imagine your armpits are holding a tennis ball.
Neck Craning and Shallow Breathing
Don’t stare at the ceiling or tuck your chin to your chest. Keep your neck neutral. Look at a spot on the floor about a foot in front of you. And breathe. Holding your breath makes everything harder. Inhale down, exhale up. Your body needs oxygen to produce force.
Doing Too Much Too Soon
Push-ups are addictive when you start seeing progress. But doing them every day can lead to sore shoulders, tired wrists, and stalled progress. Your muscles grow during rest, not during the workout. Start with three days a week. Add more only when your recovery feels solid.
Accessory Moves That Speed Up Progress
You don’t need a gym, but a few accessory exercises can help you build your first push-up faster. They target the weak links that hold you back.
Planks and Shoulder Taps
Planks teach you how to hold a rigid line. If you can’t hold a plank for 30 seconds, your push-up will fall apart. Start with forearm planks. Then move to high planks. Then add shoulder taps. These force your core to resist rotation, which is exactly what it needs to do during a push-up.
Push-Up Plus and Scapular Work
Push-up plus is a small movement with a big payoff. Start in a high plank. Without bending your elbows, push your chest away from the floor and round your upper back slightly. Then let your chest sink back down. This strengthens your serratus anterior, a muscle that helps your shoulder blade move properly. Do 2 sets of 10 to 15 reps.
Rows and Band Pull-Aparts
Push-ups train your pushing muscles. If you only push, your shoulders can get tight and imbalanced. Add rows and band pull-aparts to strengthen your upper back. A strong back gives your shoulders a stable base. You can use a resistance band, dumbbells, or a sturdy table for rows.
Recovery, Nutrition, and Mindset
Your body doesn’t get stronger during the workout. It gets stronger while you sleep, eat, and rest. Aim for 7 to 9 hours of sleep. Eat enough protein to repair muscle. Drink water. And don’t underestimate the power of patience.
Some days you’ll feel strong. Other days you’ll feel like a wet noodle. That’s normal. Progress isn’t a straight line. It’s a squiggly path with peaks and valleys. Trust the process. Show up. Do the reps. Rest. Repeat. Your first push-up is a test of consistency, not talent.
Conclusion: Your First Push-Up Is Closer Than You Think
Building up to your first push-up isn’t about brute force. It’s about smart progressions, good form, and consistent practice. Start where you are. Wall push-ups count. Incline push-ups count. Negatives count. Every rep is a brick in the foundation of your first full push-up.
So what are you waiting for? Pick a level, set a schedule, and start today. You don’t need to be perfect. You just need to be willing to try. Before you know it, you’ll lower down, press up, and realize you just did something you once thought was impossible. And then? You’ll do it again.
Frequently Asked Questions
How long does it take to get your first push-up?
It depends on your starting point. Some people get their first push-up in 4 to 6 weeks. Others need 3 to 6 months. The key is consistency. If you train 3 days a week and follow a progression, you’ll get there. Don’t compare your timeline to someone else’s.
Can I build up to a push-up if I have wrist pain?
Yes, but you need to modify. Use dumbbells, parallettes, or push-up stands to keep your wrists neutral. You can also do wall push-ups, which put less pressure on your wrists. If pain persists, see a physical therapist. Don’t push through sharp pain.
Are knee push-ups bad?
No. Knee push-ups are a valuable progression. They let you practice the push-up pattern with less load. Just make sure you keep your body in a straight line from head to knees. Don’t let your hips sag or pike. If knee push-ups are too easy, move to negatives or full push-ups.
How many days a week should I train for push-ups?
Start with 3 days a week. Give yourself at least one rest day between sessions. As you get stronger, you can add a fourth day if you recover well. More isn’t always better. Rest is when your muscles rebuild.
What if I can’t even do one incline push-up?
Go back to wall push-ups. There’s no shame in starting there. Wall push-ups build the same movement pattern with less resistance. Once you can do 3 sets of 12 wall push-ups, move to a higher incline, like a countertop. Then gradually lower the surface as you get stronger.



