Table of Contents
- Medicine Ball Exercises for Throwing Power
- Why Medicine Ball Training Builds Throwing Power
- The Difference Between Strength and Power
- Rotational Power: The Engine of Throwing
- How to Warm Up Before Medicine Ball Throws
- Dynamic Mobility for Shoulders and Hips
- Activation Drills for the Core and Glutes
- 12 Medicine Ball Exercises for Throwing Power
- 1. Rotational Scoop Throw
- 2. Standing Side Throw
- 3. Step-Behind Rotational Throw
- 4. Half-Kneeling Rotational Throw
- 5. Overhead Slam
- 6. Soccer Throw
- 7. Shot Put Throw
- 8. Wall Chest Pass
- 9. Explosive Push Pass
- 10. Reverse Overhead Throw
- 11. Medicine Ball Scoop Toss for Distance
- 12. Partner Rotational Toss
- How to Program Medicine Ball Throws for Real Results
- Sets, Reps, and Rest
- Weekly Schedule Example
- When to Use Heavy vs. Light Balls
- Common Mistakes That Kill Throwing Power
- Mistake 1: Chasing Heavy Balls Too Soon
- Mistake 2: Using Arms Instead of Hips
- Mistake 3: Skipping Deceleration Work
- Mistake 4: Training Hard but Never Measuring
- Equipment and Space You Actually Need
- Safety Rules for Explosive Throwing
- How to Track Progress
- Pairing Medicine Balls with Strength Training
- Sample 20-Minute Throwing Power Workout
- Conclusion
- FAQs
- Can medicine ball throws replace weightlifting?
- How often should I do medicine ball throws?
- What size medicine ball should I use for throwing power?
- Can I do medicine ball throws at home?
- Will medicine ball training make my shoulder sore?
Medicine Ball Exercises for Throwing Power
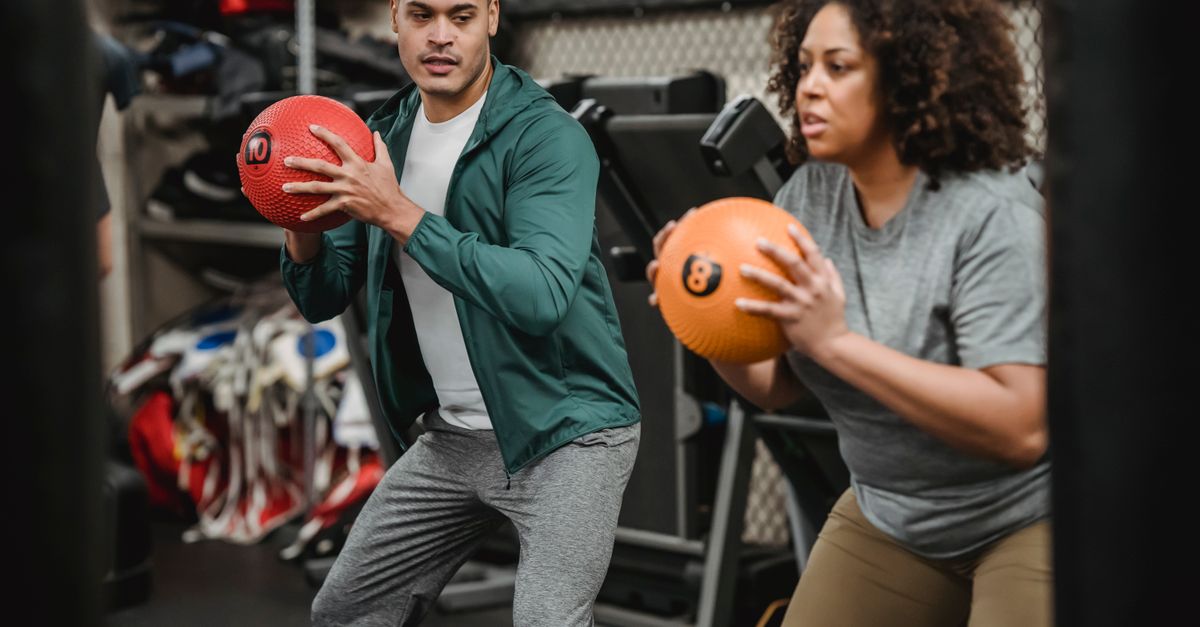
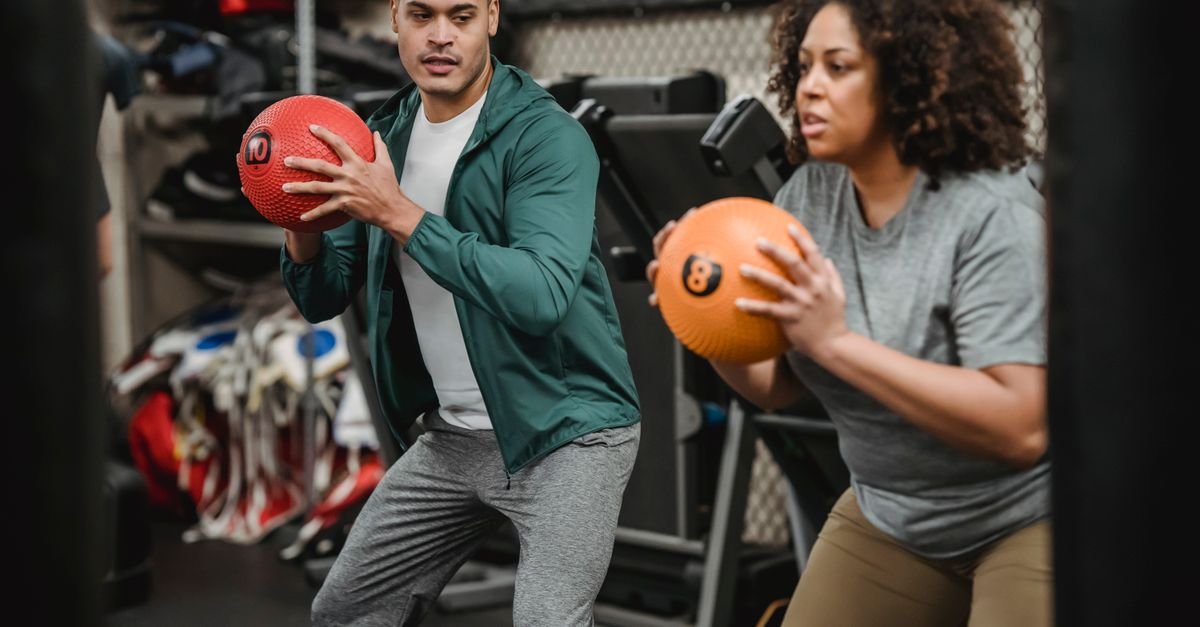
Throwing power is not just about having a cannon for an arm. It is about how well your hips, core, shoulders, and wrist work together to transfer force into the ball. If you play baseball, softball, cricket, handball, water polo, or even quarterback, you already know that a slow, heavy throw can be the difference between a highlight play and a missed opportunity. Medicine ball exercises for throwing power are one of the fastest ways to teach your body to produce explosive rotational force without beating up your elbow or shoulder.
Think of your body like a whip. The handle moves first, then the middle, then the tip cracks. If your hips and core are the handle, your arm is the tip. When the handle is slow, the tip cannot crack. Medicine ball throws train that sequence. They force you to use your lower body, rotate through your trunk, and deliver force quickly. You are not just building muscle; you are building speed, timing, and coordination.
Why Medicine Ball Training Builds Throwing Power
Medicine ball training sits in a sweet spot between strength training and sport-specific throwing. It gives you resistance, but it also lets you move explosively. Unlike a heavy barbell, a medicine ball does not force you to slow down. You can throw it, slam it, toss it, and chase it. That means you can train power with intent, which is exactly what throws demand.
Your nervous system loves variety. When you throw a medicine ball, your brain has to coordinate dozens of muscles in a fraction of a second. That is not something a slow bicep curl can teach. Medicine ball throws improve rate of force development, which is a fancy way of saying how fast you can produce force. The faster you can produce force, the harder you can throw.
The Difference Between Strength and Power
Strength is how much force you can produce. Power is how fast you can produce it. A squat shows strength. A vertical jump shows power. Throwing is a power movement. You do not have three seconds to push the ball; you have milliseconds. Medicine ball exercises bridge the gap between raw strength and explosive speed.
If you only lift heavy weights, you might get stronger but not necessarily more explosive. If you only throw a baseball, you might refine skill but not build raw power. Medicine balls let you overload the throwing pattern with resistance while still moving fast. That is why so many elite strength coaches use them with pitchers, quarterbacks, and overhead athletes.
Rotational Power: The Engine of Throwing
Most throwing motions are rotational. Your back foot pushes, your hips turn, your torso rotates, and your arm follows. If your hips are stiff or slow, your shoulder pays the price. Medicine ball rotational throws teach your body to generate force from the ground up. They also train your core to transfer that force instead of leaking it.
Imagine trying to open a heavy door by only pushing with your fingers. That is what throwing with just your arm feels like. Now imagine using your whole body to turn the handle. That is rotational power. Medicine ball throws make your whole body part of the throw.
How to Warm Up Before Medicine Ball Throws
Do not walk into a gym, grab the heaviest ball, and start slamming it. Your shoulders, hips, and core need a proper warm-up. A good warm-up raises your body temperature, improves joint mobility, and wakes up your nervous system. It also lowers your risk of pulling something when you explode into a throw.
Your warm-up should take 8 to 12 minutes. Start with easy cardio like jogging, skipping, or biking. Then move into dynamic mobility. After that, do a few activation drills. Finally, grab a light medicine ball and perform a few easy throws at 50 to 60 percent effort. You want to feel springy, not tired.
Dynamic Mobility for Shoulders and Hips
Arm circles, band pull-aparts, wall slides, and shoulder dislocates with a broomstick are excellent for the upper body. For the hips, try leg swings, hip circles, walking lunges with a twist, and deep squat holds. These movements open up the joints you need for a powerful throw.
Do not rush this part. If your hips cannot rotate, your lower back will try to do the job. If your shoulders cannot reach overhead comfortably, your elbow will take the stress. Mobility is not optional when you are training explosive throws.
Activation Drills for the Core and Glutes
Your glutes and core are the bridge between your lower body and your arm. Wake them up with glute bridges, dead bugs, bird dogs, side planks, and banded monster walks. These exercises do not need to be hard. They just need to turn on the muscles that will drive your throws.
After activation, do a few light medicine ball chest passes or side throws. Keep the effort low. You are greasing the groove, not trying to set a personal record. Once your body feels ready, you can start your real workout.
12 Medicine Ball Exercises for Throwing Power
These exercises cover rotational power, overhead power, and upper-body explosiveness. You do not need to do all 12 in one session. Pick three to five that match your sport and training goal. Quality always beats quantity.
1. Rotational Scoop Throw
Setup and Execution
Stand sideways to a wall or open field. Hold the medicine ball near your back hip with both hands. Bend your knees slightly and shift your weight into your back leg. Explode by driving your back hip forward, rotating your torso, and scooping the ball forward into the wall. Follow through with your arms and let your back foot pivot. Do 5 reps on each side.
Coaching Cue
Think “hips first, arms last.” If your arms lead, you lose power. Your hips should start the throw like a motor turning a wheel.
2. Standing Side Throw
This is a simple rotational throw that teaches full-body sequencing. Stand with feet shoulder-width apart, ball at chest height. Rotate your torso to one side, then explosively turn and throw the ball sideways into a wall. Catch it or let it bounce back. Keep your core braced and your eyes on the target. Do 6 to 8 reps per side.
You can also do this with a step. Step with your front foot, rotate, and throw. The step adds more hip drive and mimics the momentum of a real throw.
3. Step-Behind Rotational Throw
Start standing sideways to the wall. Step your back foot behind your front foot, load your hips, and then throw the ball into the wall as you rotate. This adds a bigger stretch and more power. It is excellent for baseball pitchers, softball players, and cricket bowlers. Keep your chest tall and avoid rounding your lower back.
Do 4 to 6 reps per side. Focus on a smooth turn, not a jerky yank. The step should feel like a spring loading and releasing.
4. Half-Kneeling Rotational Throw
Kneel on one knee with the other foot forward. Hold the ball at your hip. Rotate your torso and throw the ball into the wall. Because your lower body is limited, your core has to do more work. This is great for building trunk power and stability. Do 5 reps per side.
Do not let your knee cave in or your lower back arch. Keep your ribs down and your abs tight. If you feel this in your back, lighten the ball or reduce your range of motion.
5. Overhead Slam
Stand with feet hip-width apart, ball overhead. Reach tall, then slam the ball into the ground as hard as you can. Use your whole body: hips, core, shoulders, and arms. Catch the ball on the bounce or pick it up. Do 6 to 8 slams.
This exercise trains overhead power and deceleration. It also teaches you to use your lats, which are crucial for throwing. Think of your lats as rubber bands that snap your arm forward.
6. Soccer Throw
Hold the ball overhead with both hands. Step forward and throw the ball down and forward into the ground or wall. It looks like a soccer throw-in, but with more force. This movement mimics the overhead throwing pattern and builds shoulder and core power. Do 6 to 8 reps.
Keep your elbows slightly bent and your core braced. Do not let your back arch excessively. The power should come from your hips and trunk, not just your arms.
7. Shot Put Throw
Hold the ball at your chest with both hands. Push it forward as far as you can, like a shot putter. You can do this from a standing position or with a step. It builds explosive pressing power for the shoulder and chest. Do 5 to 6 reps.
Focus on pushing the ball away from your body, not just lifting it. Your legs should drive, your core should transfer, and your arms should finish. This is not a slow bench press; it is a fast, violent push.
8. Wall Chest Pass
Stand a few feet from a wall. Hold the ball at your chest. Explosively pass it into the wall and catch it. Keep your elbows tucked and your core tight. Do 8 to 10 reps. This is a classic upper-body power exercise that also improves reaction time.
You can make it harder by using a heavier ball or standing farther from the wall. You can also do it on one knee to reduce lower-body involvement. Just do not let the ball drop. Catch it with soft hands and reset quickly.
9. Explosive Push Pass
This is similar to the wall chest pass, but you use one arm at a time. Stand sideways to the wall, hold the ball at your chest, and push it forward with one hand. Rotate your torso as you push. This adds a rotational component and mimics the final phase of a throw. Do 5 reps per arm.
Do not let your shoulder roll forward. Keep your shoulder blade stable and your core engaged. If your shoulder feels pinchy, use a lighter ball or reduce the range of motion.
10. Reverse Overhead Throw
Stand with your back to the wall. Hold the ball overhead. Throw it backward over your head into the wall. This trains the posterior shoulder, upper back, and core. It also helps balance all the forward throwing you do. Do 5 to 6 reps.
Keep your ribs down and avoid arching your lower back. The movement should come from your shoulders and upper back, not from cranking your spine. This is a great exercise for overhead athletes who need healthy shoulders.
11. Medicine Ball Scoop Toss for Distance
Place the ball on the ground slightly in front of you. Squat down, grab it with both hands, and scoop it forward and up as far as you can. This is a full-body explosive movement. It teaches you to use your legs, hips, and core together. Do 4 to 6 tosses.
Think of a basketball player grabbing a loose ball and launching a full-court pass. That is the energy you want. Drive through your legs, extend your hips, and let the ball fly.
12. Partner Rotational Toss
Stand back-to-back or side-by-side with a partner. One person rotates and tosses the ball to the other. The partner catches it, rotates, and tosses it back. This adds unpredictability and reaction time. It also makes training fun. Do 8 to 10 tosses per side.
Make sure your partner is ready before you throw. Use a soft medicine ball or a rubber ball if you are new to this. Focus on smooth, powerful rotations, not wild throws. Control matters as much as speed.
How to Program Medicine Ball Throws for Real Results
Medicine ball throws are powerful, but they are also stressful. You cannot do them every day at maximum effort. Think of them like sprinting. You want short, explosive bursts with full recovery. If you turn them into a cardio workout, you lose the power-building effect.
Do medicine ball throws 2 to 3 times per week. Place them before heavy strength training or on their own day. If you throw them after a long, exhausting workout, your nervous system is already fried. You will move slowly, and slow throws do not build throwing power.
Sets, Reps, and Rest
For power, use 3 to 5 sets of 3 to 8 reps. Rest 60 to 90 seconds between sets. For rotational throws, do 5 reps per side. For overhead throws, do 4 to 6 reps. Stop a set when your speed drops noticeably. If the ball feels heavy and your throws look slow, you are done.
Use a light to moderate ball for speed work. Use a heavier ball for strength work, but keep the reps low. Never sacrifice form for fatigue. One great throw is worth more than ten sloppy ones.
Weekly Schedule Example
Monday: Rotational scoop throws, wall chest passes, strength training. Tuesday: Overhead slams, reverse overhead throws, mobility. Wednesday: Rest or light movement. Thursday: Step-behind rotational throws, half-kneeling throws, strength training. Friday: Partner rotational tosses, shot put throws. Saturday: Active recovery. Sunday: Rest.
This is just a template. Adjust it based on your sport schedule. If you have a game or competition, reduce volume two days before. You want to feel fresh and explosive, not sore and sluggish.
When to Use Heavy vs. Light Balls
Light balls, usually 2 to 6 pounds, are best for speed and explosive power. Medium balls, 6 to 10 pounds, are good for general power. Heavy balls, 10 to 20 pounds, are best for strength and slams, but they should not be used for high-speed overhead throws. A heavy ball can slow you down and put extra stress on your shoulder.
If you are new to medicine ball training, start with a 4 to 6 pound ball. Master the movement. Then slowly increase the weight. If you are training for throwing power, speed is the priority. A fast throw with a light ball beats a slow throw with a heavy ball almost every time.
Common Mistakes That Kill Throwing Power
You can do all the right exercises and still get poor results if you make these mistakes. The good news is that they are easy to fix once you know what to look for. Pay attention to your body, your tempo, and your intent.
Mistake 1: Chasing Heavy Balls Too Soon
Heavier is not always better. If you grab a 20-pound ball for overhead throws, your body will slow down to protect your joints. That defeats the purpose. Throwing power is about speed. Use heavy balls for slams and scoops, and light balls for fast rotational and overhead throws.
Mistake 2: Using Arms Instead of Hips
Your arm is the messenger, not the engine. If you throw only with your shoulder, you will get tired and possibly injured. Start every throw from the ground. Push with your legs, rotate your hips, and let your core transfer the force. Your arm should finish the job, not start it.
Mistake 3: Skipping Deceleration Work
Throwing is not just about accelerating. It is also about slowing down. Your shoulder has to decelerate your arm after the ball leaves your hand. If you never train that, you leave yourself open to injury. Reverse overhead throws, catches, and band pull-aparts help train deceleration.
Mistake 4: Training Hard but Never Measuring
If you do not track your throws, you are guessing. Measure your distance, count your reps, or film your technique. Use a radar gun if you have access. Progress in throwing power is often small, but it adds up. What gets measured gets improved.
Equipment and Space You Actually Need
You do not need a fancy gym. A medicine ball, a sturdy wall, and a non-slip floor are enough. A slam ball is great for overhead slams because it does not bounce. A rubber medicine ball is better for wall throws and partner tosses because it bounces back. If you train at home, make sure you have enough space and no breakable objects nearby.
If you do not have a wall, you can use an open field. Throw the ball and walk to pick it up. That adds a little conditioning, but it also slows down your session. For power work, a wall is usually better because you can catch and reset quickly.
Safety Rules for Explosive Throwing
Always warm up. Check the ball for cracks or damage. Make sure the floor is dry and your shoes have grip. Never throw at a person unless they are ready and looking. Keep your core braced and avoid hyperextending your lower back. If you feel sharp pain in your shoulder, elbow, or back, stop.
Use common sense. Explosive throws are fun, but they are not worth an injury. Start light, focus on technique, and gradually increase intensity. If you have a history of shoulder or back problems, talk to a qualified coach or physical therapist before adding medicine ball throws to your routine.
How to Track Progress
Track your throws in a notebook or phone app. Write down the exercise, ball weight, sets, reps, and how you felt. If you are doing distance throws, mark the distance with a cone or tape measure. If you are doing wall throws, film a few reps from the side. Look for better hip rotation, faster arm speed, and more balanced landing.
You can also use a simple rating of perceived exertion. On a scale of 1 to 10, how explosive did you feel? If your throws feel slow and heavy, you may need more rest or a lighter ball. If they feel fast and snappy, you are on the right track.
Pairing Medicine Balls with Strength Training
Medicine ball throws work best when paired with a solid strength program. Think of strength as your foundation and power as your roof. Without a strong foundation, your power will crumble. Squats, deadlifts, lunges, pull-ups, push-ups, and rotational cable exercises all support throwing power.
Do your medicine ball throws before heavy lifting. You want to be fresh and explosive. After your throws, hit the weights. This order teaches your nervous system to move fast first, then build strength. If you do it the other way around, you may be too tired to throw with maximum intent.
Sample 20-Minute Throwing Power Workout
Warm up for 5 minutes with dynamic mobility and activation drills. Then do the following circuit. Rest 60 to 90 seconds between exercises. Keep the quality high. If you feel slow, stop.
- Rotational scoop throw: 5 reps per side
- Overhead slam: 6 reps
- Wall chest pass: 8 reps
- Half-kneeling rotational throw: 5 reps per side
- Partner rotational toss: 6 reps per side
Repeat the circuit 2 to 3 times. Finish with light stretching or foam rolling. This workout is short, sharp, and effective. It builds power without leaving you exhausted.
Conclusion
Medicine ball exercises for throwing power are simple, effective, and fun. They teach your body to produce force quickly, rotate through the core, and transfer energy from the ground to the ball. You do not need a fancy gym or hours of training. You need a medicine ball, a wall, and the discipline to move explosively with good form.
Start with light balls and simple throws. Master the rotational scoop, the side throw, and the overhead slam. Then add more advanced variations like step-behind throws and partner tosses. Program them 2 to 3 times per week, track your progress, and pair them with strength training. Your throwing power will not improve overnight, but with consistency, you will feel the difference in every throw.
FAQs
Can medicine ball throws replace weightlifting?
No. Medicine ball throws are a power tool, not a complete strength program. They build explosiveness and coordination, but you still need heavy resistance training to build a strong foundation. Use both for the best results.
How often should I do medicine ball throws?
Two to three times per week is plenty for most athletes. You need recovery between sessions because explosive training stresses your nervous system. If you feel sore or slow, take an extra rest day.
What size medicine ball should I use for throwing power?
Start with a 4 to 6 pound ball for rotational and overhead throws. Use 8 to 12 pounds for slams and scoops. Heavier balls are fine for strength work, but avoid using them for high-speed overhead throws.
Can I do medicine ball throws at home?
Yes, as long as you have enough space and a sturdy wall. A slam ball works well for overhead slams, but it can damage walls. A rubber medicine ball is better for wall throws. Always check your surroundings before you throw.
Will medicine ball training make my shoulder sore?
It can if you do too much too soon or use bad technique. Start light, warm up properly, and focus on hip and core drive. Some mild soreness is normal, but sharp pain is not. If pain persists, see a medical professional.