Table of Contents
- Reverse Lunges Without Wobbling: Form Tips
- Why Reverse Lunges Make You Wobble
- Balance Is a Skill, Not a Personality Trait
- The Hidden Role of Foot Pressure
- Before You Move: Setup That Stops the Shakes
- Stance Width and Hip Position
- Where Should Your Eyes Go?
- Gaze Fixes for Beginners
- Step-by-Step Reverse Lunge Form
- Step 1: Brace Like You Mean It
- Step 2: Step Back With Control
- Step 3: Lower With a Vertical Torso
- Step 4: Push Through the Front Foot
- Common Mistake: Pushing Off the Back Toe
- Drills to Build Rock-Solid Stability
- Split Stance Holds
- Slow-Motion Reverse Lunges
- Heel-Elevated Reverse Lunges
- When to Use a Wall or TRX
- Mobility and Strength Limits That Cause Wobbling
- Ankle Mobility
- Hip Stability and Glute Strength
- Core Control Under Fatigue
- Breathing, Tempo, and Rep Schemes
- Inhale Down, Exhale Up?
- Why Slower Is More Stable
- Programming Reverse Lunges Into Your Workouts
- Beginner Plan
- Intermediate Plan
- Advanced Variations Without the Wobble
- When Wobbling Is Actually a Warning Sign
- Pain, Pinching, and Popping
- Conclusion
- FAQs
- How long does it take to stop wobbling during reverse lunges?
- Should I hold onto something while doing reverse lunges?
- Are reverse lunges better than forward lunges for balance?
- What if my knees cave in during reverse lunges?
- Can I do reverse lunges every day?
Reverse Lunges Without Wobbling: Form Tips
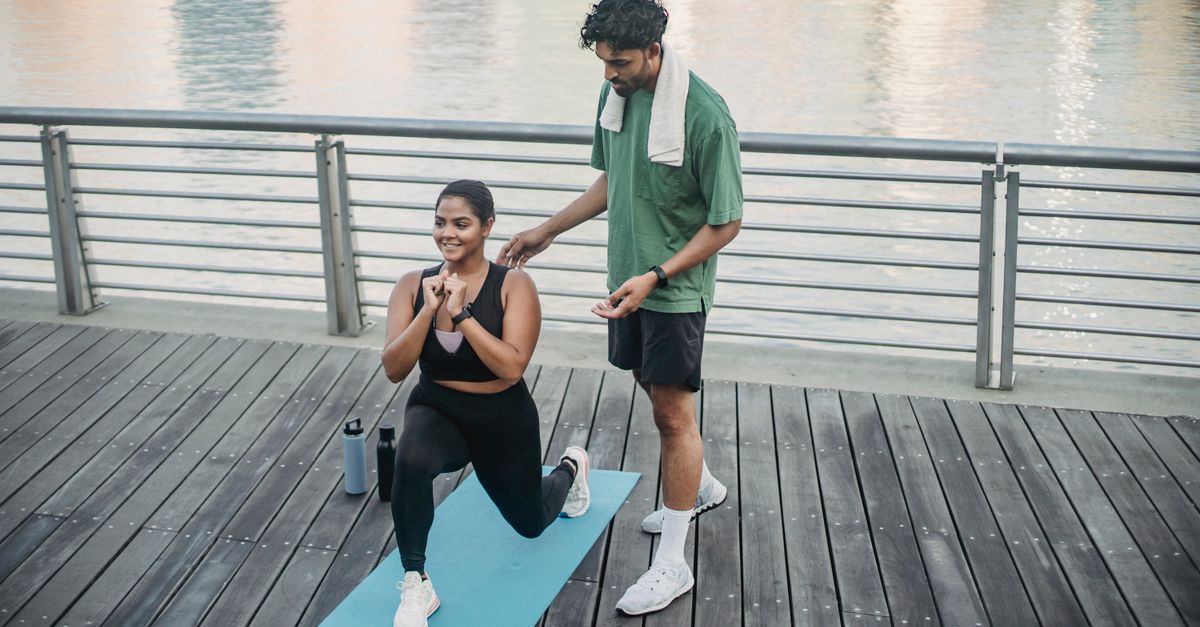
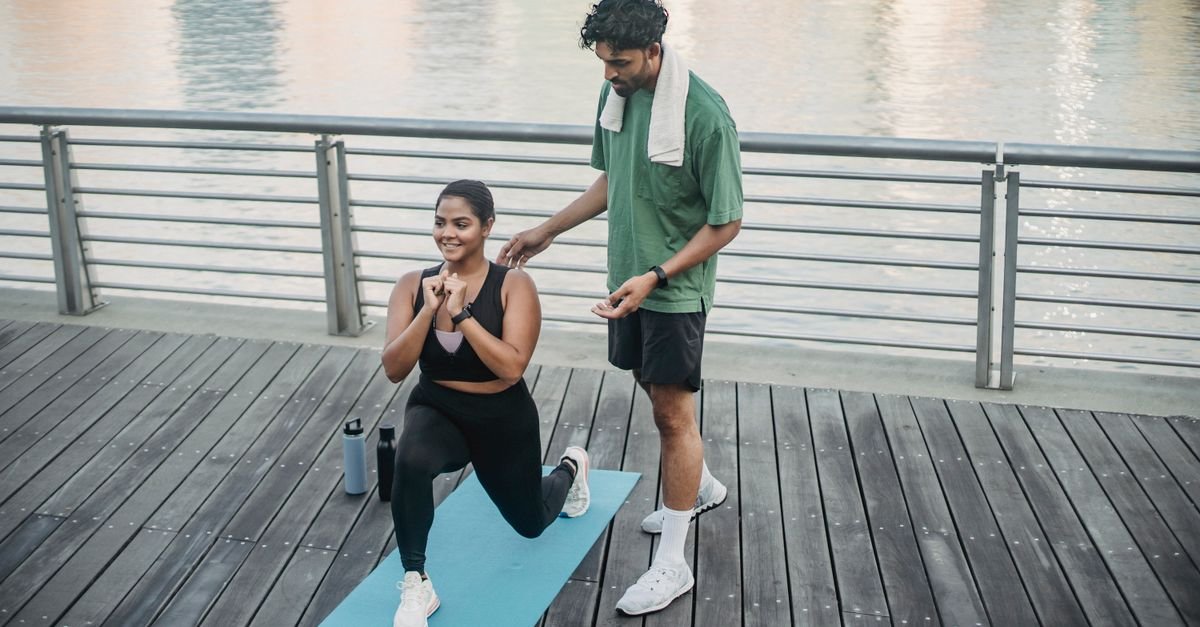
You step back. Your front knee bends. Then your hip decides to audition for a salsa routine. Sound familiar? Reverse lunges are one of the best lower-body exercises you can do, but they have a reputation for making people feel like a bowling pin in a windstorm. The good news is that wobbling is not a life sentence. It is usually a form issue, a stability issue, or a sign that your body is telling you to slow down and rebuild the movement from the ground up.
In this guide, I am going to walk you through the exact form tips that help you reverse lunge without looking like you are balancing on a skateboard. We will cover setup, foot pressure, breathing, drills, programming, and the mistakes that quietly sabotage your balance. By the end, you will have a clear plan to make reverse lunges feel strong, controlled, and maybe even enjoyable. Yes, enjoyable. Let us get into it.
Why Reverse Lunges Make You Wobble
Reverse lunges demand something most gym exercises do not: single-leg stability while your body moves through space. You are not just pushing weight. You are managing your center of mass, your hip position, your ankle mobility, and your core tension. If any one of those pieces is missing, your nervous system sends a wobble signal. That wobble is not failure. It is feedback.
Balance Is a Skill, Not a Personality Trait
Some people seem to lunge like statues. Others shake like a leaf. That difference is rarely about courage or natural talent. Balance is a trainable skill, just like a bicep curl or a push-up. Your body learns balance through repetition, exposure, and progressive challenge. If you avoid reverse lunges because they feel shaky, you never give your nervous system the chance to adapt. The fix is not to avoid them. The fix is to make them easier, cleaner, and more repeatable.
The Hidden Role of Foot Pressure
Your foot is your foundation. When you lunge, most of your stability comes from how you press into the floor. If your weight drifts to the inside edge of your front foot, your knee caves in and your hip follows. If you roll onto your toes, your heel lifts and your balance disappears. Think of your foot like a tripod: the big toe mound, the little toe mound, and the heel. Keep all three points connected to the ground. That simple cue can calm a surprising amount of wobble.
Before You Move: Setup That Stops the Shakes
Most people rush the setup. They step back before they have even found their balance. That is like trying to park a car while the parking brake is off. Before you move, you need a stable starting position. Your setup should feel athletic, grounded, and ready.
Stance Width and Hip Position
Stand with your feet about hip-width apart. Do not stand with your feet glued together like you are waiting for a bus in a snowstorm. A slightly wider base gives you room to move. Your hips should be square, not twisted. Imagine you have headlights on your hip bones and they are pointing straight ahead. If one hip rotates open, your lunge becomes a twist, and twisting under load is a fast track to wobble city.
Where Should Your Eyes Go?
Your eyes lead your body. If you stare at your feet, your posture collapses. If you stare at the ceiling, you lose your reference point. Pick a spot on the wall or floor about 6 to 10 feet in front of you. Keep your gaze steady. This gives your brain a fixed point to anchor to while your legs move. It sounds too simple to matter, but it works.
Gaze Fixes for Beginners
If you still feel shaky, try this: stand on one foot and stare at a fixed point for 20 seconds. Then do the same thing while moving your head side to side. Notice how much harder it gets? That is because your visual system is tied to your balance system. During reverse lunges, keep your head still and your eyes locked. Let your legs do the moving.
Step-by-Step Reverse Lunge Form
Now let us build the lunge from the ground up. Each step matters. If you skip one, the wobble usually shows up somewhere else.
Step 1: Brace Like You Mean It
Before you step back, take a breath into your belly, not your chest. Then gently brace your core as if someone is about to poke your stomach. You are not sucking in. You are creating pressure. This pressure protects your spine and gives your hips a stable center to work around. A strong brace is like tightening the lug nuts on a wheel. Without it, everything rattles.
Step 2: Step Back With Control
Step back far enough that your front knee can bend to about 90 degrees without your heel lifting. Do not step so far that you are doing a split. Do not step so short that your knee shoots past your toes. A good rule: your back knee should lower toward the floor, and your front shin should stay close to vertical. The step back should be deliberate, not a fall backward.
Step 3: Lower With a Vertical Torso
As you lower, keep your torso tall. Leaning forward turns a lunge into a strange squat and shifts your weight onto your toes. Think about sinking straight down, not diving forward. Your back knee should hover just above the floor. Your front knee should track over your second toe, not cave inward. If your knee caves, your glutes are not doing their job. Squeeze the front glute like you are trying to crack a walnut between your cheeks. Too much? Good. That cue works.
Step 4: Push Through the Front Foot
To stand back up, push through your entire front foot, especially the heel and midfoot. Do not yank yourself forward with your back leg. The front leg is the engine. The back leg is a kickstand. If you push mostly through your back toe, you will feel your balance shift forward and your front knee may complain. Drive through the floor, stand tall, and bring your back foot forward to the starting position.
Common Mistake: Pushing Off the Back Toe
Pushing off the back toe feels natural because it is how we walk and run. But in a reverse lunge, it steals stability from the front leg. Your back foot should be a light support, not the motor. Imagine your back foot is on a piece of paper. You do not want to crumple it. You just want to rest it there while your front leg does the heavy lifting.
Drills to Build Rock-Solid Stability
If reverse lunges still feel like a balancing act, do not keep forcing bad reps. Use drills to teach your body what stable feels like. These are simple, effective, and you can do them before your workout or on their own.
Split Stance Holds
Set up in a split stance with one foot forward and one foot back. Lower down into the bottom of a lunge and hold it for 20 to 30 seconds. Do not move. Just breathe and feel your front foot. Are you pressing through all three points? Is your front knee tracking straight? This drill removes the step-back phase and lets you focus on stillness. Once you can hold without shaking, add the step back.
Slow-Motion Reverse Lunges
Take 3 to 4 seconds to step back and lower. Pause for 1 second at the bottom. Then take 2 to 3 seconds to stand up. Slow tempo forces your stabilizer muscles to work overtime. It also exposes where your form breaks down. If you wobble at a certain point, you have found your weak link. Fix that range with holds or partial reps, then try again.
Heel-Elevated Reverse Lunges
If your ankle mobility is limited, your heel may lift during the lunge. That sends your weight forward and creates wobble. Try placing a small wedge or weight plate under your front heel. This keeps your heel down and lets you sink deeper without losing balance. It is not cheating. It is a tool. Once your ankle opens up, you can remove the wedge.
When to Use a Wall or TRX
There is no shame in holding onto a wall, a squat rack, or a TRX strap while you learn. Use it for balance, not for pulling yourself up. Lightly touch the support with your fingertips. Your legs should still do 95 percent of the work. As you get stronger, use one finger, then no fingers. This is called fading the assist, and it is one of the fastest ways to build confidence.
Mobility and Strength Limits That Cause Wobbling
Sometimes the wobble is not about technique. It is about what your body can physically do. If your ankle cannot bend, your hip cannot stabilize, or your core cannot hold pressure, your nervous system will find another way to move. That other way usually looks like a wobble.
Ankle Mobility
Your front ankle needs to bend enough to let your knee travel forward while your heel stays down. If it does not, your heel pops up and your balance shifts. Test it: stand facing a wall with your toes 4 inches away. Can you touch the wall with your knee without lifting your heel? If not, your ankle mobility needs work. Calf stretches, ankle mobilizations, and heel-elevated lunges can help.
Hip Stability and Glute Strength
Your glutes are the brakes and the steering wheel of a lunge. If your glute medius is weak, your knee caves in and your hip drops. If your glute max is weak, you cannot stand up powerfully. Add exercises like side-lying hip raises, clamshells, glute bridges, and single-leg deadlifts. These build the support system your reverse lunge needs.
Core Control Under Fatigue
Your core is not just your abs. It is your entire trunk working to keep your ribs over your pelvis. When you get tired, your core gives up first. Your torso leans, your hips shift, and suddenly you are wobbling. Train your core with anti-rotation and anti-extension exercises like dead bugs, bird dogs, and Pallof presses. A stable trunk makes a stable lunge.
Breathing, Tempo, and Rep Schemes
Breathing is not just for staying alive. It is a stability tool. If you hold your breath the entire set, your blood pressure spikes and your form falls apart. If you breathe too fast, you lose core tension. Find a rhythm.
Inhale Down, Exhale Up?
Yes, that is a good default. Inhale as you step back and lower. Exhale as you drive up. The exhale helps you brace and creates a natural rhythm. If you need more stability at the bottom, take a small sip of air, brace, and then exhale as you stand. Do not overthink it. Just keep breathing.
Why Slower Is More Stable
Speed hides bad form. When you move fast, momentum does the work. When you slow down, your muscles have to control every inch. Start with a 3-second lower and a 2-second rise. Once that feels solid, you can add speed or weight. But do not rush the process. Stability first, strength second, speed last.
Programming Reverse Lunges Into Your Workouts
How you program reverse lunges matters as much as how you do them. If you put them at the end of a brutal leg workout, your wobble might just be fatigue. If you put them first, you can focus on quality. Here are some simple plans.
Beginner Plan
Do 2 to 3 sets of 6 to 8 reps per leg. Use no weight or a pair of light dumbbells. Hold onto a wall or rack if needed. Rest 60 to 90 seconds between sets. Focus on slow, controlled reps. If you wobble, stop the set. Quality beats quantity every time.
Intermediate Plan
Do 3 to 4 sets of 8 to 12 reps per leg. Add moderate dumbbells or a kettlebell in a goblet position. Use a 2-second pause at the bottom. Rest 60 seconds. If you feel stable, add a deficit by standing on a small platform. The extra range challenges your balance and strength.
Advanced Variations Without the Wobble
Try front-racked reverse lunges, reverse lunges with a pause, or reverse lunges on a balance pad. You can also add a rotation or a reach, but only if your basic lunge is rock solid. Advanced variations are not better if they make you look like a newborn deer. Master the basics first.
When Wobbling Is Actually a Warning Sign
Not all wobbling is harmless. If you feel sharp pain, pinching, or a joint that feels like it is going to give out, stop. Balance issues can be a sign of an injury, a neurological issue, or a structural problem. Listen to your body.
Pain, Pinching, and Popping
Pain in the front of your knee, a pinch in your hip, or a pop in your ankle is not something to push through. Muscle fatigue feels like burning. Joint pain feels sharp or pinchy. If you feel the latter, back off and consult a professional. A good trainer or physical therapist can assess your movement and give you a personalized plan.
Conclusion
Reverse lunges do not have to feel like a circus act. When you set up with a stable stance, brace your core, press through your whole foot, and control your tempo, the wobble fades. It takes practice, but every clean rep trains your nervous system to trust your body. Start with drills, use support when you need it, and gradually add difficulty. Before you know it, you will be lunging like a pro, not wobbling like a wobble toy. Your legs, hips, and confidence will thank you.
FAQs
How long does it take to stop wobbling during reverse lunges?
It depends on your starting point. Some people feel more stable in 2 to 3 weeks with consistent practice. Others need 6 to 8 weeks, especially if they have ankle or hip mobility limitations. The key is to practice with good form, not just add more reps. Quality reps train balance faster than sloppy ones.
Should I hold onto something while doing reverse lunges?
Yes, if it helps you learn the movement. Use a wall, rack, or TRX for light support. Do not pull yourself up with your arms. Just touch the support for balance. As you get stronger, use fewer fingers and eventually no support. It is a tool, not a crutch.
Are reverse lunges better than forward lunges for balance?
Reverse lunges are often easier to control because you step back into a stable position instead of forward into the unknown. That makes them a great choice for beginners or anyone working on balance. Forward lunges are also valuable, but reverse lunges tend to be more knee-friendly and less wobbly for most people.
What if my knees cave in during reverse lunges?
Knee caving usually means your glutes are not engaging enough. Focus on pressing your front knee out over your second toe. Actively squeeze your glute on the front leg. If it still happens, reduce the weight and add glute medius exercises like clamshells and side-lying hip raises. Also check your foot pressure. If your arch collapses, your knee follows.
Can I do reverse lunges every day?
You can, but you probably should not if you are lifting heavy or doing high volume. Your muscles need recovery. For most people, 2 to 3 times per week is plenty. If you are doing bodyweight reverse lunges as a warm-up or mobility drill, daily is fine. Just pay attention to fatigue and joint pain. If your form breaks down, take a rest day.