Table of Contents
- Rowing Machine Basics: Learn the Stroke Order
- Why the Rowing Stroke Order Matters
- What You Need Before Your First Pull
- The Four Phases of the Rowing Stroke
- The Golden Rule: Legs, Core, Arms, Arms, Core, Legs
- Rowing Machine Basics: Common Stroke Order Mistakes
- How to Coordinate Breathing With the Stroke
- Damper Settings and Stroke Rate for Beginners
- How to Build a Simple Rowing Machine Workout
- Rowing Machine Basics: Form Cues That Stick
- How to Fix Your Stroke Order With Drills
- What Muscles Does Rowing Work?
- Rowing Machine Basics: Indoor vs. On-Water Differences
- How Long Should You Row as a Beginner?
- When to Increase Intensity and Duration
- Conclusion: Own the Order, Own the Stroke
- FAQs
Rowing Machine Basics: Learn the Stroke Order
If you’ve ever climbed onto a rowing machine and felt like a tangled octopus, you’re not alone. The rower looks simple enough: you sit down, pull a handle, and slide back and forth. But the moment you try to make it smooth, everything seems to happen at once. Your arms yank, your legs push, your back bends, and your breath gets lost somewhere in the middle.
Here’s the good news: rowing is not a mystery. It’s a sequence. Once you learn the stroke order, the machine stops feeling like a chaotic fitness test and starts feeling like a rhythm you can control. That rhythm is built on four phases: catch, drive, finish, and recovery. Get those in the right order, and you’ll row stronger, smoother, and with far less strain.
This guide breaks down rowing machine basics with a focus on the stroke order. You’ll learn what to do first, what to do last, and how to avoid the common habits that make rowing feel awkward. Whether you’re using a gym rower, a home machine, or a water rower, the same sequence applies.
Why the Rowing Stroke Order Matters
Think of a rowing stroke like a chain. Every link has a job, and the chain only works when each link moves in the right order. If your arms pull before your legs push, you’re trying to lift a heavy box with your fingers instead of your whole body. If your knees bend too early on the recovery, you clip your hands and break your rhythm. The order isn’t just about looking polished. It’s about transferring power efficiently and protecting your lower back.
When you row in the correct order, your legs do the heavy lifting. Your core connects your upper and lower body. Your arms finish the job. Then, on the way back, your arms relax, your body rocks forward, and your legs bend only after the handle passes your knees. This sequence lets the largest muscles in your body do the most work. It also keeps your spine in a safer, stronger position.
Get the order wrong, and you’ll feel it. Your forearms burn. Your lower back aches. Your stroke rate climbs while your power drops. You might even think rowing “just isn’t for you.” But it is. You just need to slow down and learn the order.
What You Need Before Your First Pull
Before you worry about speed or watts, set yourself up. A few small adjustments make a huge difference in how the stroke feels.
- Foot straps: Place them across the widest part of your feet, usually just below the toes. Don’t crank them down like you’re strapping into a roller coaster. You want secure, not numb.
- Seat position: Sit on the front half of the seat, not perched on the edge and not slumped back. Your sit bones should feel planted.
- Handle grip: Hold the handle with a relaxed hook, not a death grip. Your fingers wrap around it, but your thumbs don’t need to strangle it.
- Posture: Sit tall. Imagine a string pulling the crown of your head toward the ceiling. Keep your shoulders down and your chest open.
- Damper setting: For beginners, a damper between 3 and 5 is usually plenty. Higher isn’t better. It just makes each pull heavier without teaching you better technique.
Once you’re set up, take a few easy strokes. Don’t worry about power. Just feel the machine. Your goal is to learn the order, not to win a race in the first five minutes.
The Four Phases of the Rowing Stroke
Every rowing stroke has four phases. They flow together, but you can practice them separately. That’s actually one of the best ways to learn. Let’s walk through each one in order.
The Catch: Setup for Power
The catch is the starting position. It’s the moment before you push. Your knees are bent, your shins are vertical or close to it, and your arms are extended straight toward the flywheel. Your body has a slight forward lean from the hips, but your back is flat and strong.
Imagine a sprinter in the starting blocks. They’re coiled, ready, but not tense. That’s the catch. You’re not yanking yet. You’re loading the spring.
What Your Body Should Feel
At the catch, you should feel weight on the footplates. Your hamstrings and glutes are engaged. Your arms are relaxed but straight. Your core is braced, not crunched. If your lower back is rounded like a tired Monday morning, reset. Sit tall, hinge from the hips, and keep your chest proud.
Common mistake: pulling with your arms immediately. At the catch, your arms are just hooks. They don’t start the pull. Your legs do.
The Drive: Legs First, Then Core, Then Arms
The drive is where the work happens. It’s the push. And the order here is non-negotiable: legs, then core, then arms.
First, push with your legs. Drive your feet into the footplates like you’re jumping horizontally. Your seat moves backward, and your hands travel with the handle because your arms are still straight. Next, as your legs finish extending, swing your torso back slightly. Finally, pull the handle to your lower ribs.
It’s a wave of power. Legs start it. Core transfers it. Arms finish it. If you pull with your arms first, you cut the wave short.
The Power Sequence
Try this mental cue: “Push, swing, pull.” That’s the drive in three words. Push with the legs. Swing with the body. Pull with the arms. Say it out loud if you need to. It sounds silly, but it works.
Another cue: imagine you’re pushing the ground away with your feet while the handle stays glued to your ribs. The handle isn’t moving because you’re yanking it. It’s moving because your legs are creating space.
The Finish: Arms, Core, and a Strong Lean
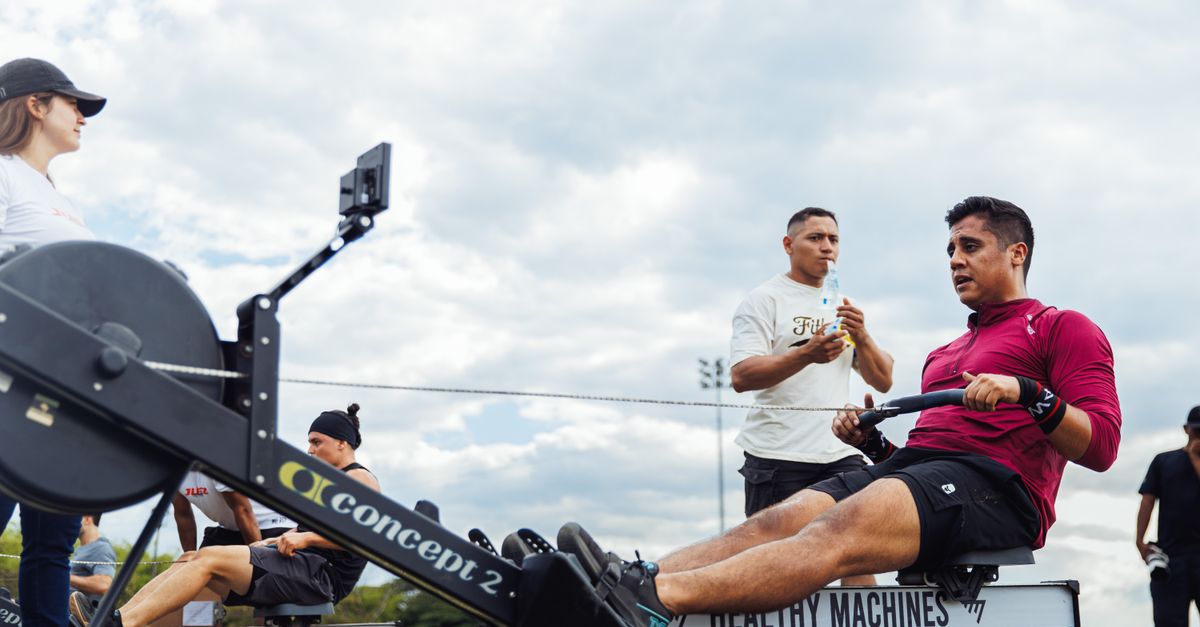
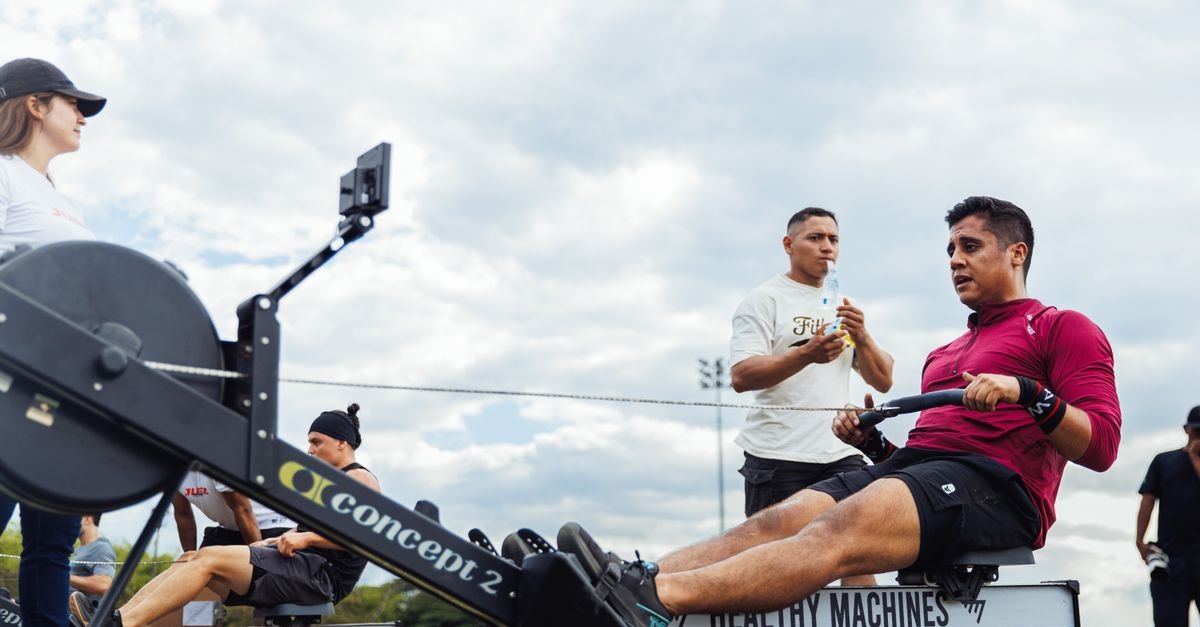
The finish is the end of the drive. Your legs are fully extended, your torso is leaning back slightly, and your arms have pulled the handle to your lower ribs. Your elbows are out to the sides, not flared wide like chicken wings. Your shoulders are relaxed.
Think of a strong finish as a proud posture. You’re not falling backward. You’re not over-arching. You’re just tall, stable, and connected. The handle should feel like it’s resting against your body, not crashing into it.
Where Your Hands and Body End Up
At the finish, your hands are near your lower ribs. Your wrists stay flat. Your legs are straight but not locked. Your core is engaged to keep your torso from collapsing. If your lower back is doing all the work, check your sequence. The legs should have already done the heavy lifting.
One quick check: can you pause at the finish without wobbling? If yes, you’re in a strong position. If no, you’re probably leaning too far back or gripping too hard.
The Recovery: Arms, Core, Then Legs
The recovery is the return. It’s not a rest, but it’s not a race either. The order here is the reverse of the drive: arms, then core, then legs.
First, extend your arms away from your body. Let the handle travel forward. Next, hinge forward from your hips, letting your torso follow the handle. Finally, bend your knees and slide forward toward the catch. The handle should pass over your knees before they bend. That’s the key.
If you bend your knees too early, you’ll hit the handle. If you rush the recovery, you’ll lose your rhythm and tire out faster. The recovery is where you set up the next powerful drive.
The Rhythm of Reset
Think of the recovery as a slow breath. The drive is quick and powerful. The recovery is longer and controlled. A good beginner ratio is about one count for the drive and two counts for the recovery. That rhythm gives you time to reset your posture and prepare for the next push.
Imagine rowing like a pendulum. The drive is the swing forward. The recovery is the gentle return. If you yank both ways, you’re fighting the machine. If you relax into the recovery, you’ll find a flow.
The Golden Rule: Legs, Core, Arms, Arms, Core, Legs
If you remember nothing else, remember this: Legs, core, arms, arms, core, legs. That’s the stroke order in six words. On the drive, your legs go first, then your core, then your arms. On the recovery, your arms go first, then your core, then your legs.
This rule keeps you from pulling with your arms too early. It keeps you from bending your knees before the handle passes them. It keeps your back safe. It makes your stroke more powerful without extra effort.
Write it on a sticky note. Say it in your head. Use it as a checklist for every stroke until it becomes automatic. That’s the beauty of rowing machine basics: once the order clicks, everything else gets easier.
Rowing Machine Basics: Common Stroke Order Mistakes
Even with the best intentions, beginners often slip into a few common habits. The good news is that each mistake has a simple fix.
Pulling With Your Arms Too Early
This is the classic beginner move. You sit down, grab the handle, and your arms immediately curl. It feels natural because you’re trying to move the handle. But it’s wrong. Your arms are the smallest link in the chain. When they start the pull, they steal power from your legs.
Fix it by doing the legs-only drill. Keep your arms straight and push with your legs. Let the handle move because your body moves, not because your arms pull. Once you feel that, add the body swing. Then add the arms.
Bending Your Knees Before Your Hands Pass Them
On the recovery, your hands must pass over your knees before your knees bend. If you bend your knees too early, you create a traffic jam. The handle bumps into your legs, and you have to lift it awkwardly. That breaks your rhythm and wastes energy.
Fix it by slowing down the recovery. Reach your arms forward first. Then hinge your torso. Then, and only then, bend your knees. Think “arms, body, legs” on the way back.
Rushing the Recovery
When you’re tired or trying to go fast, it’s tempting to rush the recovery. You slide forward quickly, then yank again. But rowing isn’t a tug-of-war. The recovery is your chance to reset. If you rush it, you’ll shorten your stroke and lose power.
Fix it by counting. Drive for one count. Recover for two. That slower return gives you time to breathe and set up a stronger next stroke. You’ll actually go faster overall because each drive will be more powerful.
Rounding Your Back at the Catch
At the catch, it’s easy to slump. Your knees are bent, your hands are forward, and your lower back wants to curve. But a rounded back under load is a recipe for aches and poor power transfer.
Fix it by hinging from your hips, not your spine. Imagine your torso is a plank. You can tilt it forward from the hips, but you don’t bend it in the middle. Keep your chest up and your core braced. If you can’t hold that position, reduce your forward lean. A smaller lean with a flat back beats a deep lean with a rounded spine.
How to Coordinate Breathing With the Stroke
Breathing on a rowing machine can feel weird at first. You’re moving, pulling, and trying to remember the order. Where does breath fit in?
A simple pattern works for most beginners: exhale on the drive, inhale on the recovery. As you push with your legs and pull the handle, breathe out. As you extend your arms and slide forward, breathe in. This pattern matches the effort. You exhale when you work, and you inhale when you reset.
Don’t force it. If you need a quick extra breath, take it. The goal is rhythm, not a rigid rule. Once you get comfortable, your breathing will sync naturally with the stroke.
Damper Settings and Stroke Rate for Beginners
The damper setting is not a difficulty dial. It controls how much air flows into the flywheel. A higher damper makes the flywheel harder to spin, but it doesn’t automatically make you stronger. In fact, many beginners set the damper too high and then struggle to keep good form.
Start with a damper between 3 and 5. That range feels moderate for most people. If you’re on a Concept2 rower, you can also check the drag factor in the monitor. For beginners, a drag factor around 110 to 130 is a good target. But don’t overthink it. If the stroke feels smooth and you can maintain good order, you’re in the right zone.
Stroke rate is how many strokes you take per minute. Beginners often row too fast. They think faster equals better. But rowing is more like cycling than sprinting. You can generate more power with a slower, stronger stroke. Aim for a stroke rate of 20 to 24 strokes per minute. That pace gives you time to feel the order: legs, core, arms, arms, core, legs.
How to Build a Simple Rowing Machine Workout
You don’t need a complicated plan to start. A simple beginner workout can be done in 15 to 20 minutes. Here’s one that focuses on stroke order.
- Warm-up: Row easily for 3 minutes. Focus on smooth strokes, not speed.
- Drill set: Do 2 minutes of legs-only rowing, 2 minutes of arms-only rowing, and 2 minutes of full-stroke rowing. Rest 30 seconds between drills.
- Main set: Row for 10 minutes at a comfortable pace. Every 2 minutes, check your order. Are your legs starting the drive? Are your arms finishing it?
- Cool-down: Row easy for 2 minutes. Let your breathing settle.
As you improve, you can add intervals. For example, row hard for 1 minute, then easy for 1 minute. Repeat 8 times. But keep the stroke order as your number one priority. Speed comes later.
Rowing Machine Basics: Form Cues That Stick
Sometimes a single phrase can fix your whole stroke. Here are a few cues that work well for beginners.
- “Push the floor away.” This reminds you to start with your legs.
- “Hang on the handle.” This keeps your arms relaxed and straight during the drive.
- “Ribs to hips.” This cue helps you finish with your core, not just your arms.
- “Hands over knees.” This keeps your recovery in the right order.
- “Slow back, fast forward.” This reminds you to take a longer recovery and a quicker drive.
Pick one cue per workout. Don’t try to fix everything at once. Small adjustments add up to big changes.
How to Fix Your Stroke Order With Drills
Drills break the stroke into pieces so you can feel each part. They’re not punishment. They’re learning tools. Try these four drills during your warm-up or as a separate 10-minute practice.
Legs-Only Drill
Keep your arms straight and your torso still. Push with your legs only. Let your seat slide back, and let the handle travel with you. Don’t pull with your arms. Don’t swing your body. Just feel your legs do the work. Then return slowly. This drill teaches you that the drive starts with your legs.
Arms-Only Drill
Start at the finish position with your legs straight and your torso leaning slightly back. Now pull with your arms only, then extend them again. Your legs stay still. Your body stays still. This drill teaches you what the arms should do at the end of the drive. It also shows you how little work the arms should do compared to the legs.
Pause Drill at the Finish
Row a normal stroke, but pause for one second at the finish. Check your posture. Are you leaning back too far? Are your elbows out wide? Are your shoulders tense? Then recover slowly. This drill helps you find a strong finish position and prevents you from rushing into the recovery.
Reverse Pick Drill
The reverse pick drill starts from the finish and adds parts in reverse. First, do arms only. Then add a slight body swing. Then add half a leg drive. Then full legs. This drill helps you feel the recovery order: arms, body, legs. It’s a great way to slow down and connect the whole stroke.
What Muscles Does Rowing Work?
Rowing is often called a full-body workout, and for good reason. When you row with the correct order, you use your legs, core, back, shoulders, and arms. Your quads and glutes drive the stroke. Your hamstrings help with the recovery. Your core stabilizes your spine. Your lats and upper back pull the handle. Your biceps and forearms assist at the finish.
Because rowing is low-impact, it’s gentler on your knees than running. But it still builds strength and endurance. The more you focus on the order, the more you’ll feel your legs and core working. If you only feel your arms, you’re probably pulling too early.
Rowing Machine Basics: Indoor vs. On-Water Differences
Indoor rowing and on-water rowing share the same stroke order, but they feel different. On the water, you have to balance a boat, deal with wind and waves, and coordinate with other rowers. On a machine, you don’t have to worry about tipping over. That makes the indoor rower a perfect place to learn the sequence.
One key difference is the catch. On the water, the blade enters the water and you immediately feel resistance. On an indoor rower, the flywheel creates resistance, but it’s more forgiving. You can practice the catch without worrying about splashing or catching a crab. Use the machine to build muscle memory, and if you ever try real rowing, the order will already be in your body.
How Long Should You Row as a Beginner?
Start with 10 to 15 minutes. That’s enough time to practice the stroke order without overwhelming your muscles. If you feel good, add 5 minutes each week. There’s no need to row for an hour on day one. Rowing is a skill. Your body needs time to adapt.
Pay attention to your form, not the clock. A focused 12-minute row with good technique is better than a sloppy 30-minute row. Quality beats quantity every time.
When to Increase Intensity and Duration
Once you can row for 20 minutes with smooth, consistent strokes, you can start adding intensity. But don’t just row faster. Instead, row stronger. Push a little harder with your legs during the drive, then relax more on the recovery. This is called ratio rowing, and it builds power without sacrificing form.
You can also add intervals. Try 1 minute hard, 1 minute easy, repeated 8 to 10 times. Or row 500 meters, rest 1 minute, and repeat 4 times. As always, if your form breaks down, slow down. The stroke order is the foundation. Without it, intensity just reinforces bad habits.
Conclusion: Own the Order, Own the Stroke
Rowing machine basics come down to one simple idea: the stroke has an order. Legs, core, arms on the drive. Arms, core, legs on the recovery. When you follow that order, rowing feels less like a struggle and more like a smooth, powerful rhythm. Your legs do the heavy work, your core connects the movement, and your arms finish the job. The recovery gives you time to reset and breathe.
Don’t worry if it feels awkward at first. Every rower, from beginner to Olympian, has had to practice the sequence. Start slow. Use the drills. Pick one cue and focus on it. Before you know it, the order will become automatic. And once it does, you’ll unlock the real benefits of rowing: a full-body workout that’s efficient, low-impact, and surprisingly meditative. So hop on, sit tall, and remember the golden rule. Your next stroke can be your best one yet.
FAQs
1. What is the correct order of a rowing stroke?
The correct order is catch, drive, finish, recovery. On the drive, push with your legs first, then swing your core, then pull with your arms. On the recovery, extend your arms first, then hinge your torso forward, then bend your knees.
2. Why do my arms get tired so quickly on the rowing machine?
Your arms are probably doing too much work. If you pull with your arms before your legs finish pushing, you’re using small muscles for a big job. Focus on starting the drive with your legs and keeping your arms straight until the very end.
3. Should I set the damper to 10 for a better workout?
No. A damper of 10 makes the flywheel harder to spin, but it doesn’t make you stronger. Most beginners do best with a damper between 3 and 5. Higher settings often lead to poor form and lower power.
4. How fast should I row as a beginner?
Aim for a stroke rate of 20 to 24 strokes per minute. That pace gives you time to feel the order and keep your form clean. Speed comes later. Focus on power per stroke, not strokes per minute.
5. Can I learn correct rowing form on an indoor rower?
Absolutely. The indoor rower is one of the best places to learn the stroke order because you don’t have to balance a boat or deal with water conditions. Once the sequence becomes muscle memory, it transfers well to on-water rowing.