Resistance Bands: A Simple Full-Body Routine
Table of Contents
- Introduction: Why Resistance Bands Deserve a Spot in Your Gym Bag
- What Are Resistance Bands, Anyway?
- The Surprising Benefits of Band Training
- Before You Start: A Few Ground Rules
- The Simple Full-Body Routine
- How to Structure Your Week
- Common Mistakes to Avoid
- How to Progress Over Time
- Conclusion: Small Band, Big Results
- Frequently Asked Questions
Introduction: Why Resistance Bands Deserve a Spot in Your Gym Bag
Let me guess. You’ve seen those colorful elastic bands hanging in the corner of the gym, or maybe tucked away in a drawer somewhere in your house. They look almost too simple, right? Like something you’d use for a light stretch before the “real” workout begins. Well, I’m here to tell you that those stretchy loops are some of the most underrated tools in fitness, and once you understand what they can do, you might just ditch the dumbbells for a while.
Here’s the thing: you don’t need a rack of iron to build real, functional strength. You don’t need a pricey gym membership or a garage full of equipment. What you need is a little bit of space, some consistency, and a resistance band or two. That’s it.
In this article, I’m walking you through a complete full-body routine you can do at home, in a hotel room, at the park, or honestly anywhere you can stand and move. But first, let’s break down what resistance bands actually are, why they work, and how to use them without hurting yourself. Sound good? Let’s get into it.
What Are Resistance Bands, Anyway?
At their core, resistance bands are elastic cables, loops, or tubes that create tension when you stretch them. That tension is what your muscles fight against. The more you stretch the band, the harder it pulls back. Simple physics, right?
But here’s where it gets interesting. Unlike a dumbbell, which gives you the same weight throughout the entire movement, a band gets harder the further you stretch it. That’s called “variable resistance,” and it’s actually a fantastic way to train because your muscles have to work harder at the point where they’re strongest, which reduces strain on your joints at the weaker points of the movement.
Think of it like a rubber band you’d fiddle with at your desk. When it’s loose, there’s barely any tension. Pull it tight, and suddenly it’s fighting back. Your muscles respond to that changing tension in a way that builds strength and stability simultaneously.
The Different Types of Resistance Bands
Not all bands are created equal, and knowing the difference will save you some confusion when you’re shopping.
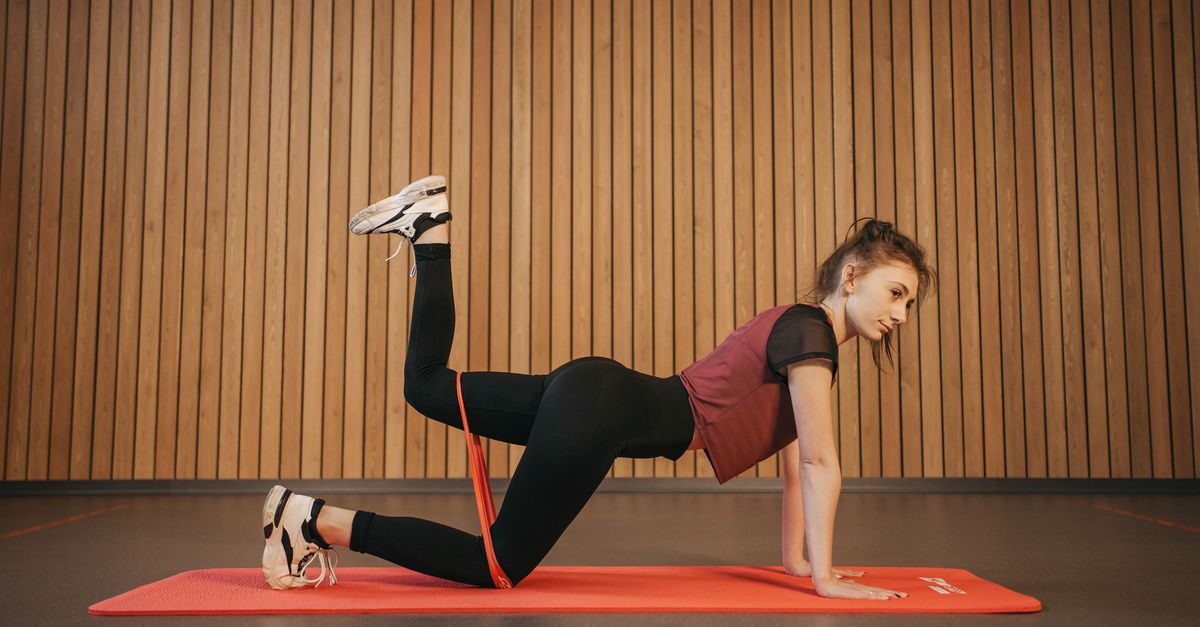
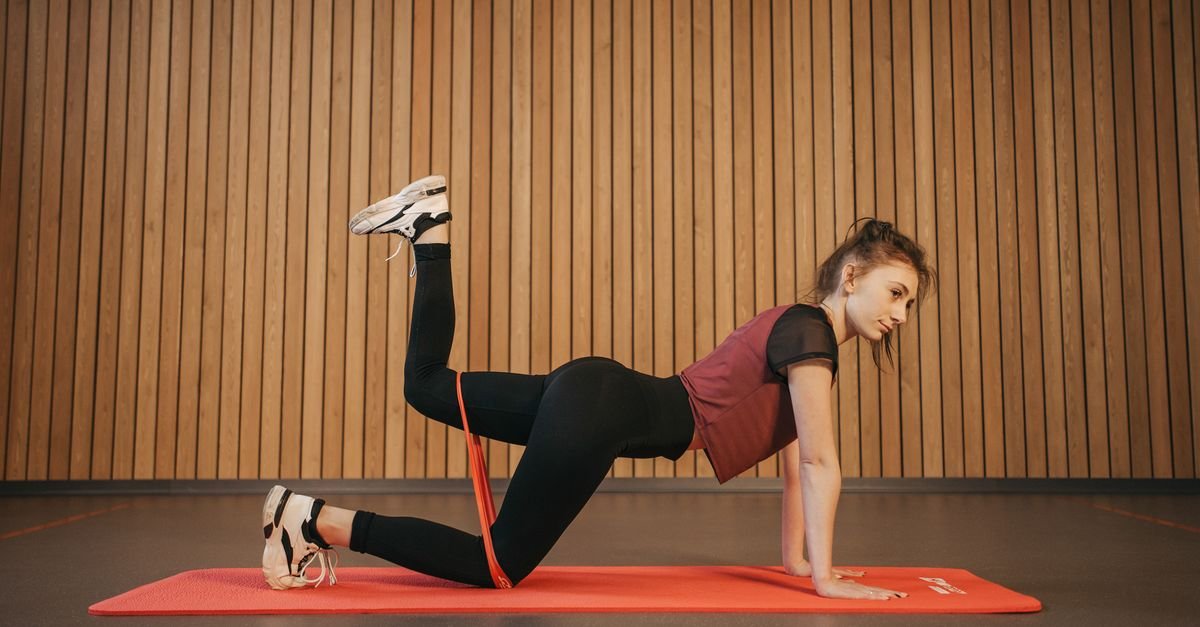
- Loop bands (mini bands): These are the short, flat loops you’ve probably seen people use around their thighs or ankles. They’re great for glute activation, hip work, and adding resistance to bodyweight moves.
- Long loop bands: Bigger versions of the mini bands, usually used for full-body movements like squats, pull-aparts, and assisted pull-ups.
- Tube bands with handles: These look more like traditional gym equipment. They come with handles and sometimes door anchors, which make them super versatile for pressing, rowing, and curling movements.
- Therapy bands (flat bands): These are long, flat strips often used in physical therapy. They’re great for rehab and mobility work, but you can absolutely use them for a full workout too.
For the routine in this article, a set of loop bands and a tube band with handles will cover just about everything. If you only have one type, don’t sweat it. You can adapt most movements.
Why Bands Beat Weights (Sometimes)
Now, I’m not saying you should never touch a barbell again. But there are real situations where bands outperform traditional weights.
For starters, bands are incredibly portable. Try stuffing a set of dumbbells into your carry-on. Not happening. Bands slip into a backpack pocket and weigh next to nothing. Traveling for work? Visiting family? You can still get a solid workout in without skipping a beat.
Second, bands are gentle on your joints. Because the resistance builds gradually, there’s no sudden shock load at the bottom of a movement. If you’ve got cranky knees or a finicky shoulder, bands can let you train hard without waking up the next day feeling like you got hit by a truck.
Third, they’re affordable. A good set of bands costs less than a single session with a personal trainer. That’s a pretty solid return on investment if you ask me.
The Surprising Benefits of Band Training
Let’s go a little deeper into why this stuff works, because understanding the “why” keeps you motivated when the “how” gets boring.
Joint-Friendly Strength Training
Remember how I mentioned variable resistance? That’s not just a fancy term. It’s a legit advantage. When you’re lifting a heavy barbell, the weight is constant. That means the weakest point in your range of motion takes the same load as the strongest point. That’s a recipe for strain and injury over time.
Bands flip that script. The tension is lowest at the start of the movement and highest at the end. So your joints get a gentle introduction, and your muscles get challenged right where they can handle it. For anyone dealing with nagging aches or coming back from an injury, this is a game-changer.
Portability That Can’t Be Beat
I touched on this already, but it deserves its own section. A resistance band routine can happen literally anywhere. Your living room. A hotel room. A park bench. The beach. Your office during lunch break. The list goes on.
This matters because consistency is the single biggest factor in getting results. If your workout requires a 30-minute drive to the gym, you’re way more likely to skip it when life gets busy. If your workout lives in a drawer next to your couch? Much easier to just do it.
Progressive Overload Without the Heavy Iron
Progressive overload is just a fancy way of saying “make it harder over time.” With weights, you add more plates. With bands, you have a few options:
- Use a thicker band (they’re usually color-coded by resistance level)
- Double up on bands
- Shorten the band by gripping it tighter or stepping on more of it
- Slow down your reps to increase time under tension
So yes, you can absolutely keep getting stronger with bands. You just have to be a little more creative.
Before You Start: A Few Ground Rules
Alright, before we jump into the actual routine, let’s cover some basics so you don’t hurt yourself or get frustrated.
Warming Up Those Muscles
Don’t skip this. I know it’s tempting, especially when you’re short on time, but a cold muscle is a stiff muscle. Spend five minutes doing some light cardio (jumping jacks, marching in place, a quick walk around the block) and then run through a few dynamic stretches.
Arm circles, leg swings, hip circles, and some gentle band pull-aparts will wake up your body and get blood flowing to the right places.
Form First, Resistance Second
Here’s a rule I want you to tattoo on your brain: never sacrifice form for resistance. If you’re using a band that’s so heavy you’re contorting your body just to complete a rep, you’re using the wrong band.
Start lighter than you think you need. Master the movement pattern. Feel the target muscle working. Then, and only then, move up in resistance.
The Simple Full-Body Routine
Okay, here’s the meat and potatoes. This routine hits every major muscle group, takes about 30 to 40 minutes, and can be done three to four times a week. Do each exercise for 2 to 3 sets of 10 to 15 reps, resting 45 to 60 seconds between sets.
Upper Body Moves That Pull Their Weight
1. Band Pull-Aparts
Hold a long loop band or tube band in front of you with straight arms. Pull the band apart until your arms are stretched wide, squeezing your shoulder blades together. Slowly return to the start. This is fantastic for posture and upper back strength.
2. Band Chest Press
Anchor the band behind you (a door anchor works great) or wrap it around your back. Hold the handles at chest level and press forward until your arms are almost straight. Squeeze your chest at the end, then slowly bring your hands back.
3. Band Rows
Anchor the band in front of you at chest height. Hold the handles with arms extended, then pull them toward your torso, driving your elbows back. Squeeze your back muscles, then extend again with control.
4. Band Bicep Curls
Stand on the middle of the band and hold the handles with palms facing up. Curl your hands toward your shoulders, keeping your elbows pinned to your sides. Lower slowly.
5. Band Overhead Press
Stand on the band and hold the handles at shoulder height. Press straight up overhead until your arms are nearly locked out, then lower with control.
Lower Body: Building a Solid Foundation
6. Band Squats
Stand on the band with feet shoulder-width apart, holding the handles at shoulder level. Squat down like you’re sitting in a chair, keeping your chest up and knees tracking over your toes. Drive back up through your heels.
7. Band Glute Bridges
Lie on your back with a mini band looped just above your knees. Feet flat on the floor, knees bent. Push through your heels to lift your hips toward the ceiling, squeezing your glutes hard at the top. Lower and repeat.
8. Band Lateral Walks
Place a mini band around your ankles or just above your knees. Get into a slight squat position and step sideways, maintaining tension on the band the whole time. Take 10 to 15 steps in one direction, then switch.
9. Band Romanian Deadlifts
Stand on the band with both feet, holding the handles in front of your thighs. Hinge at the hips, pushing your butt back while keeping a slight bend in your knees. Feel the stretch in your hamstrings, then squeeze your glutes to stand back up.
10. Band Lunges
Stand on the band with your front foot, holding the handles at your sides. Step back with the other foot into a lunge, lowering until both knees are bent at about 90 degrees. Push through your front heel to return to standing.
Core Work You’ll Actually Feel
11. Band Pallof Press
Anchor the band at chest height to your side. Stand perpendicular to the anchor, holding the handle with both hands at your chest. Press the band straight out in front of you, resisting the pull that wants to rotate your torso. Hold for a second, then bring it back.
12. Band Woodchops
Anchor the band high or low. Hold the handle with both hands and rotate your torso diagonally, like you’re chopping wood. Control the return. This one lights up your obliques.
13. Band Dead Bugs
Lie on your back with a mini band looped around your feet. Extend one leg out while lowering the opposite arm overhead, keeping your lower back pressed into the floor. Return and switch sides.
How to Structure Your Week
You don’t need to do this routine every single day. In fact, you shouldn’t. Your muscles need time to recover and rebuild.
Here’s a simple schedule that works well for most people:
- Monday: Full-body band routine
- Tuesday: Light cardio or a walk
- Wednesday: Full-body band routine
- Thursday: Rest or mobility work
- Friday: Full-body band routine
- Saturday: Active recovery (hiking, swimming, yoga)
- Sunday: Rest
If three full-body days feels like too much at first, start with two and build up. Listen to your body. It’ll tell you what it needs.
Common Mistakes to Avoid
Even with something as straightforward as bands, people find ways to mess it up. Here are the big ones:
- Using a band that’s too heavy: Ego lifting isn’t just a gym bro problem. If you can’t complete the rep with good form, go lighter.
- Letting the band snap back: The return phase is just as important as the effort phase. Control it.
- Holding your breath: Breathe out on the effort, in on the return. Simple.
- Skipping the warm-up: I already said this, but it bears repeating.
- Not checking the band for wear and tear: A frayed band can snap and whack you. Inspect them regularly and replace when needed.
How to Progress Over Time
You can’t just do the same thing forever and expect results. Your body adapts. That’s both a blessing and a curse.
Here’s how to keep challenging yourself:
- Increase resistance: Move to a thicker band or double up.
- Add reps: Go from 10 reps to 12 to 15 before increasing resistance.
- Slow things down: A 3-second lower phase makes a light band feel much heavier.
- Shorten rest periods: Less rest means more metabolic stress.
- Add instability: Do exercises on one leg or on a balance pad.
Pick one variable at a time. Don’t change everything at once, or you won’t know what’s working.
Conclusion: Small Band, Big Results
Here’s the bottom line: you don’t need a fancy gym or a ton of equipment to get strong, lean, and healthy. A simple set of resistance bands and a little consistency can take you further than you might think.
This full-body routine hits every major muscle group, fits into a busy schedule, and travels wherever you go. It’s joint-friendly, scalable, and honestly, kind of fun once you get the hang of it.
So grab a band. Roll out a mat. Give it 30 minutes. Your body will thank you, and you might just surprise yourself with how strong you really are.
Frequently Asked Questions
1. Can I really build muscle with just resistance bands?
Absolutely. Muscle growth comes from progressive overload and time under tension, not from heavy iron specifically. As long as you’re consistently challenging your muscles with increasing resistance, you can build lean muscle with bands alone.
2. How often should I do this full-body routine?
Two to four times per week is ideal for most people. Start with two and work your way up. Make sure you’re giving your muscles at least one full day of rest between sessions.
3. What resistance level should I start with?
Start lighter than you think you need. Most band sets come with light, medium, and heavy options. Begin with the light or medium band, focus on form, and move up when the reps start feeling easy.
4. Are resistance bands good for beginners?
They’re actually perfect for beginners. Bands are forgiving on the joints, easy to learn, and let you scale the difficulty up or down instantly. Plus, they’re cheap, so you’re not making a big investment before you know if you’ll stick with it.
5. How long until I see results?
With consistent training two to three times per week, most people notice improved strength and muscle tone within four to six weeks. Visible changes usually show up around the eight to twelve week mark, depending on your diet, sleep, and overall lifestyle.